

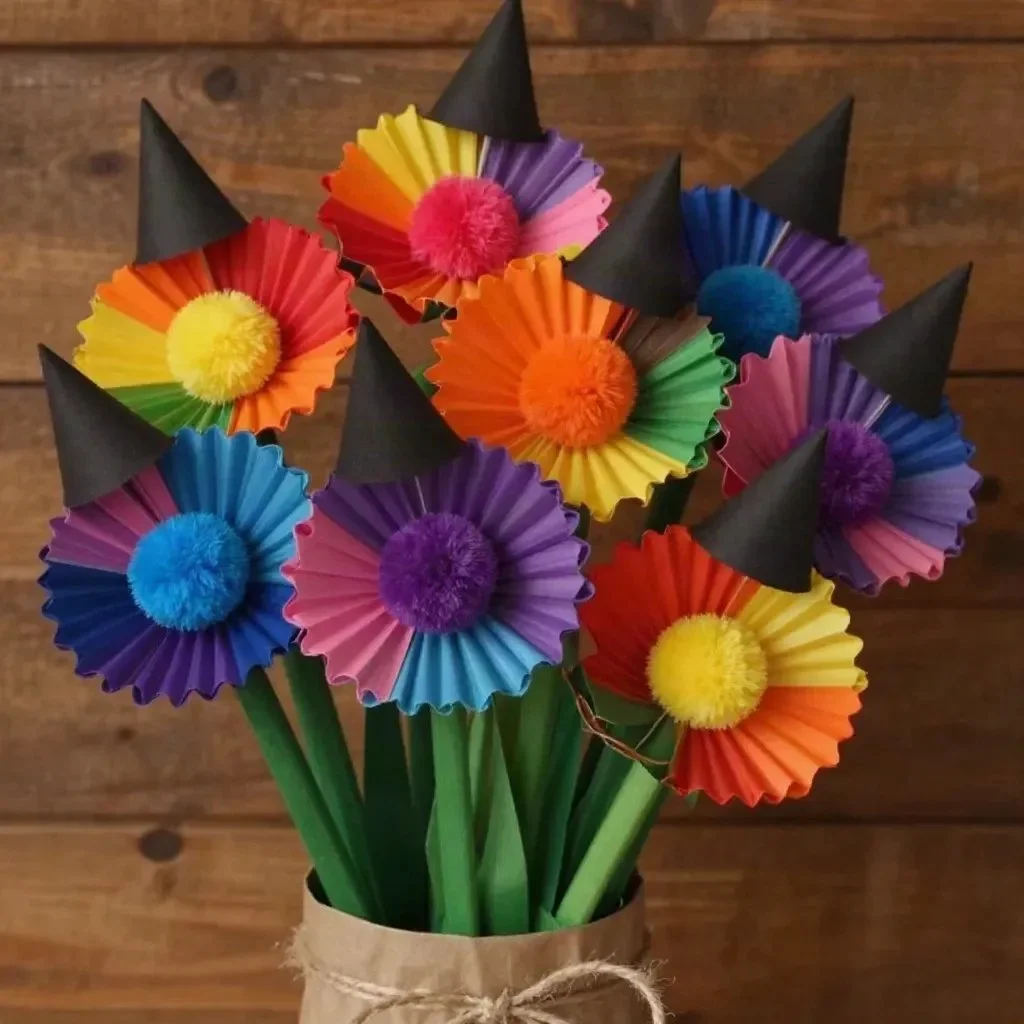
Colorful Cupcake Liner Witch Hat Flowers Tutorial
Get ready to make some adorable Colorful Cupcake Liner Witch Hat Flowers! This crafty project is not just easy and fun, but it’s also an eye-catching way to bring some Halloween spirit into your home decor. Imagine vibrant, layered flower shapes made from rainbow cupcake liners, topped with whimsical witch hats crafted from black cardstock. These delightful flowers can brighten up any room and serve as fantastic decorations or gifts. The best part? You only need a few simple materials to get started! You may also find Colorful Cupcake Liner Witch Flower Bouquet Craft useful.
You may also find Cupcake Liner Dahlia Bouquet Diy Centerpiece Kids useful.
Materials You’ll Need
To complete this charming project, gather the following materials:
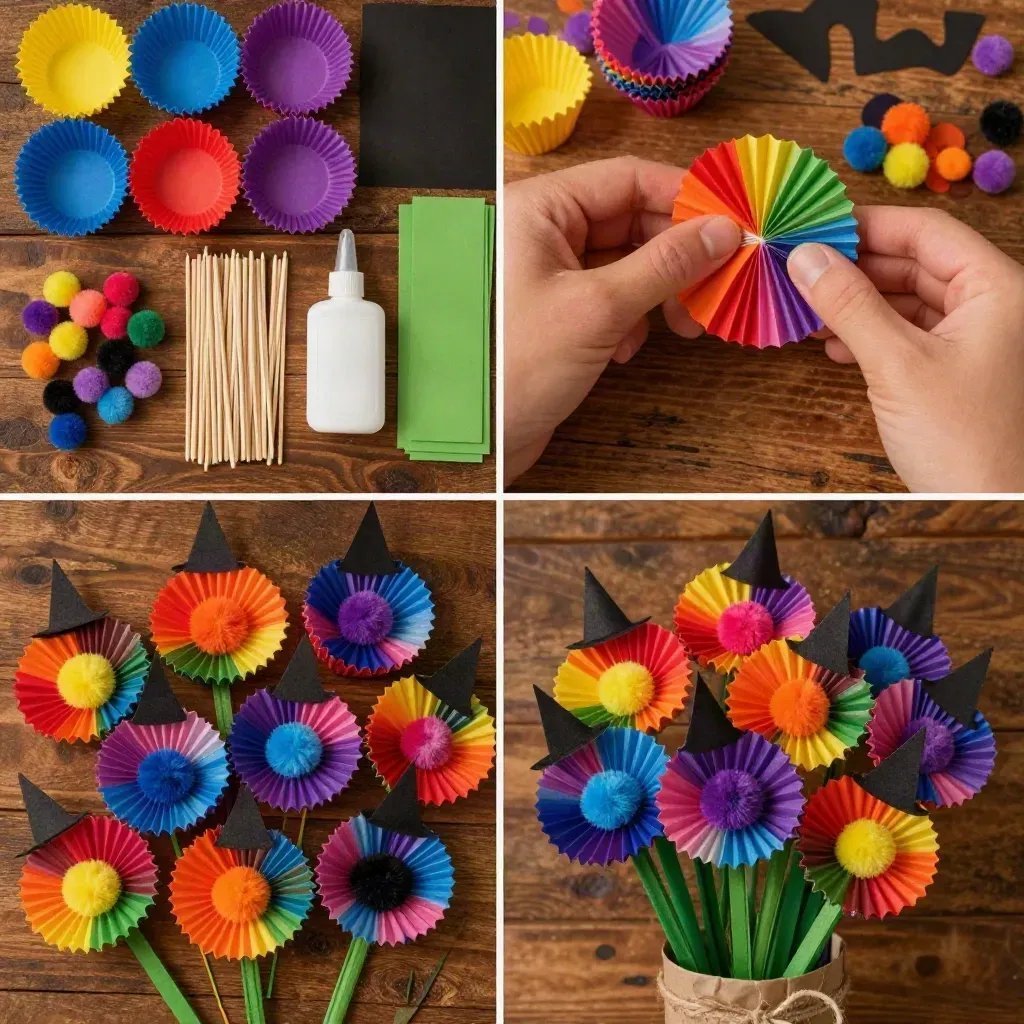
- 10 rainbow cupcake liners
- Black cardstock
- Craft sticks
- Pom-poms (various colors)
- Glue (white school glue or hot glue)
- Green paper (like construction paper or cardstock)
These materials are not only easy to find but also provide a family-friendly crafting experience. With your supplies ready, let’s dive into the step-by-step instructions below!
Step-by-Step Instructions
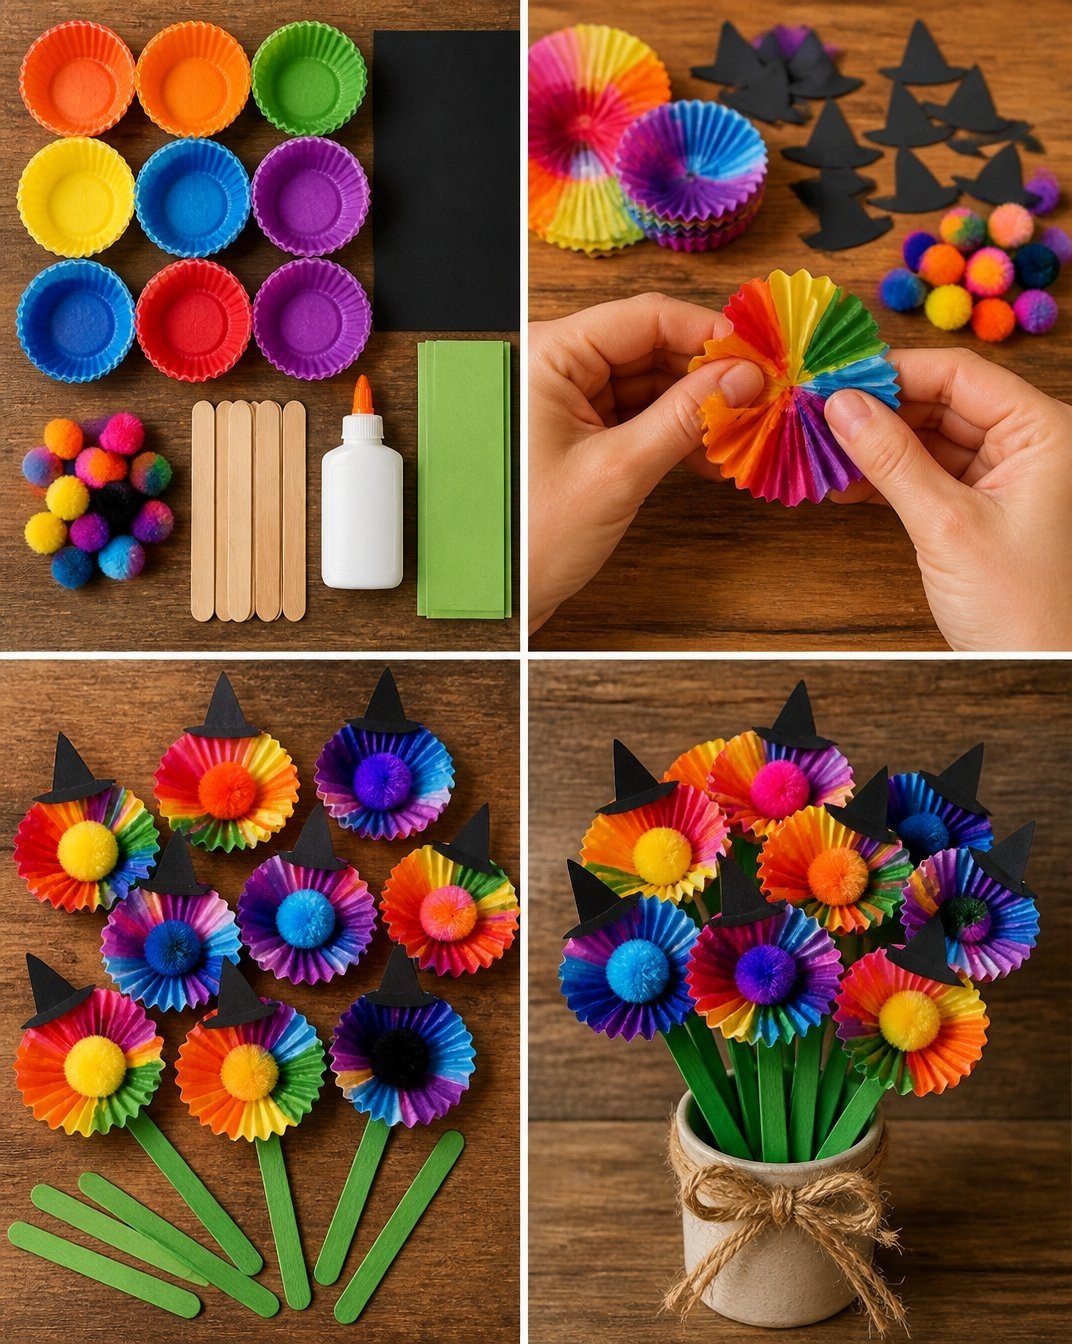
1. Shape Your Flowers
Start by transforming the rainbow cupcake liners into beautiful flower shapes. Fold or gather each liner slightly, layering them in a way that allows the colors to alternate. The more you mix and match, the more visually appealing your flowers will be. This layering technique will give your flowers a delightful, dimensional look.
2. Create Witch Hats
Next, take the black cardstock and cut it into small witch hat shapes. Aim for a size that complements your cupcake liner flowers. A simple triangular shape with a brim can do the trick! These hats will add a fun, spooky touch to your colorful blooms.
3. Assemble the Flowers
Once you have your flowers and hats ready, it’s time to assemble them! Use glue to attach a pom-pom in the center of each flower. Then, affix a mini witch hat on top of the pom-pom. This not only completes the look but also adds a playful element to each flower. If you are looking for other variations on cupcake liner flower crafts, check out this flower bouquet tutorial for additional inspiration and ideas.
4. Create the Stems
To give your flowers a proper stand, cover the craft sticks with green paper by wrapping the paper around them securely. Glue the ends of the paper. Then, attach the stems to the back of each flower using glue. The green paper adds that perfect touch of foliage to your whimsical creations.
5. Let It Dry
After assembling everything, allow the glued components to dry completely before handling your flowers. This will ensure that all parts stay in place and your cute creations hold their shape.
Helpful Tips
- Experiment with Colors: Don’t hesitate to mix different colors and patterns of cupcake liners to create unique looks.
- Witch Hat Size: Adjust the size of the witch hats based on the sizes of your flowers for better proportion.
- Pom-Pom Variety: Use pom-poms of different colors to match the cupcake liners for a more cohesive look.
Frequently Asked Questions
How Long Should I Let the Glue Dry?
For best results, allow at least 30 minutes for the glue to set completely, depending on the type of glue you use.
Can Kids Join In On This Craft?
Absolutely! This project is perfect for children, but it’s recommended for adults to assist with cutting and using the hot glue gun to ensure safety.
What If I Don’t Have Rainbow Cupcake Liners?
You can easily substitute with any cupcake liner colors you have at home; just remember that brighter colors will make the flowers pop!
Conclusion
Crafting these Colorful Cupcake Liner Witch Hat Flowers is not only a fantastic way to celebrate Halloween but also an opportunity to unleash your creativity. When you’re ready for even more cupcake liner inspiration, be sure to explore this collection of creative crafts that you can make with cupcake liners, adding an extra sprinkle of color to your crafting endeavors. Happy crafting!
Print
Colorful Cupcake Liner Witch Hat Flowers
- Total Time: 15 minutes
- Makes: 6 flowers
Description
Create charming Colorful Cupcake Liner Witch Hat Flowers for a festive Halloween decoration.
Materials
- 10 rainbow cupcake liners
- Black cardstock
- Craft sticks
- Pom-poms (various colors)
- Glue (white school glue or hot glue)
- Green paper (like construction paper or cardstock)
Instructions
- Shape Your Flowers by transforming the cupcake liners into flower shapes.
- Create Witch Hats by cutting black cardstock into small shapes.
- Assemble the Flowers by attaching pom-poms and mini witch hats.
- Create the Stems by wrapping green paper around craft sticks.
- Let It Dry completely before handling your flowers.
Notes
Experiment with colors and patterns to create unique flower looks.