

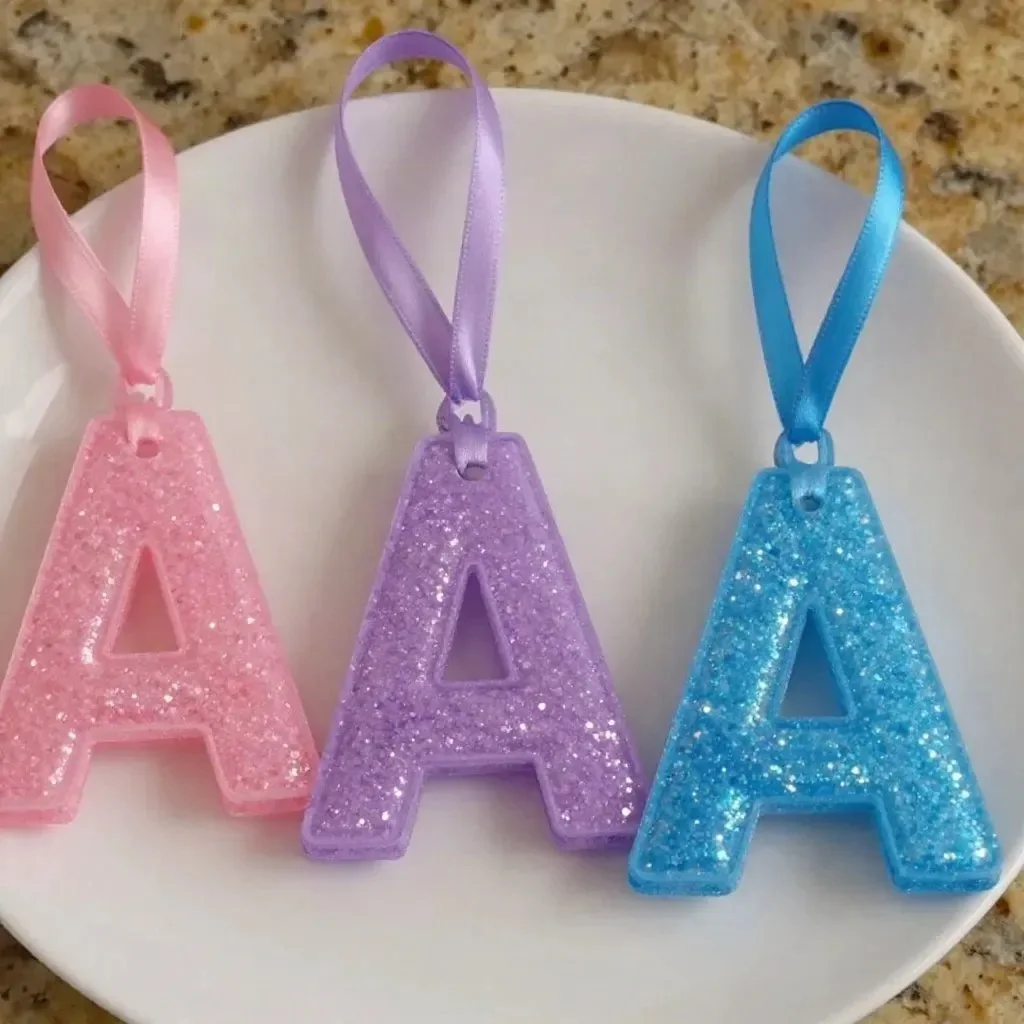
Crystal Initial Ornament: Sparkling Personalized Letter Keepsake
Crafting a Crystal Initial Ornament is a delightful way to create a personalized keepsake that shines with unique flair. Using clear epoxy resin and iridescent glitter flakes, you can transform a simple mold into a stunning display piece. This project not only adds a touch of sparkle to any space but is also incredibly satisfying to create, making it a perfect craft for beginners and families. You may also find Rainbow Crystal Bat Clothespin Mobile For Kids useful.
You may also find Rainbow Crystal Butterfly Suncatcher Craft useful.
Materials You’ll Need
To get started on your Crystal Initial Ornament, prepare the following materials:
- 1 clear plastic initial ornament mold
- 2 cups clear epoxy resin
- 3 tablespoons iridescent glitter flakes
- 1 silver metal jump ring
- 10 inches satin ribbon
How to Make Crystal Initial Ornament: Sparkling Personalized Letter Keepsake
Creating your ornament follows a straightforward process. Here’s how to bring your personalized letter to life:
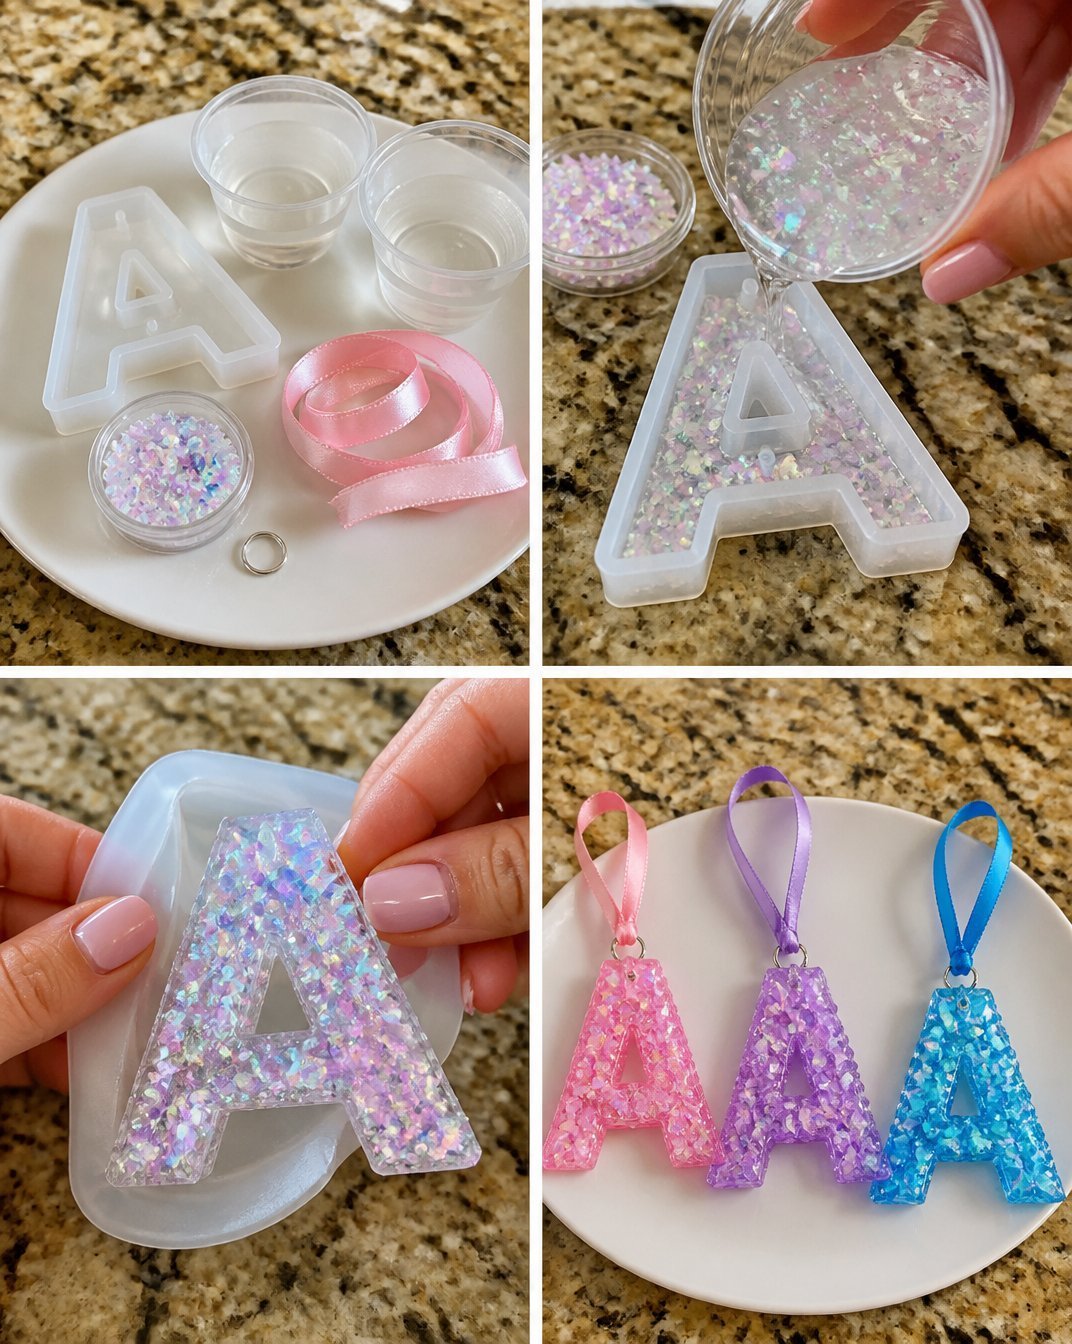
Prepare Your Workspace: First, ensure you have a clean and well-ventilated area to work in. Mixing epoxy resin can produce fumes, so it’s crucial for your safety.
Mix the Epoxy Resin: Follow the package instructions carefully. Combine the two cups of clear epoxy resin until it reaches a smooth consistency. Take your time to prevent bubbles during mixing.
Add Glitter for Sparkle: Next, gently fold in the 3 tablespoons of iridescent glitter flakes into your resin mixture. The glitter will create a shimmering effect that makes your ornament eye-catching.
Pour into Mold: Carefully pour your glitter-flake resin into the clear plastic initial mold. Make sure to fill it evenly without overflow. This is where your chosen letter will take shape!
Curing Process: After pouring, let your ornament cure undisturbed for about 24 hours in a dust-free environment. This step is vital for achieving the right hardness and clarity.
Release and Finish: Once the resin has cured, gently flex the mold to release your ornament. If you notice any rough edges, you can sand them lightly for a smoother finish. Finally, attach the silver jump ring and thread the satin ribbon through for hanging.
Helpful Tips for Success
Here are some extra tips to ensure a smooth crafting experience:
Use a Stir Stick: When mixing the resin, use a stir stick to ensure all the components are well combined, preventing unmixed areas that might affect the curing.
Prevent Bubbles: To minimize bubbles in your resin, try tapping the sides of the mold gently after pouring. This action can help release trapped air.
Consider Shimmering Variations: If you’re looking to create a variation, consider using different colors of glitter or adding more layers of color to create a gradation effect.
Common Mistakes to Avoid
Every crafting journey has its challenges. Here are a few pitfalls to watch out for:
Incorrect Ratios: Ensure that you measure your resin components accurately. Incorrect proportions can lead to sticky or improperly cured ornaments.
Overmixing: While it’s important to mix well, overmixing can introduce bubbles. Mix just until you achieve a uniform color and texture.
Ignoring Drying Conditions: Make sure your ornament cures in a dust-free area. Dust particles can mar the surface of your finished piece.
Frequently Asked Questions
How long does it take for the resin to cure?
The resin typically requires about 24 hours to cure completely, but always check the manufacturer’s instructions as brands can vary.
Can I use other colors of glitter?
Absolutely! You can experiment with any color of glitter to personalize your ornament according to your decor or preferences.
What if I want to hang the ornament outside?
Consider using UV-resistant resin if you plan to display the ornament outside, as standard resin can yellow with prolonged sun exposure.
Display Ideas
Once your Crystal Initial Ornament is complete, consider these delightful display options:
- Hang it on a holiday tree for a personalized touch.
- Attach it to gifts as a unique tag.
- Use it as part of your home decor by pairing it with similar handcrafted items.
Conclusion
Creating a Crystal Initial Ornament allows you to celebrate personal expression through crafting. It’s a fun and engaging project that you can enjoy with family or friends. If you’re looking for more ways to incorporate crystals and creativity into your crafts, you might find inspiration in this creative cake topper that captures a similar sparkle!
Print
Crystal Initial Ornament: Sparkling Personalized Letter Keepsake
- Total Time: 24 hours 15 minutes
- Makes: 1 ornament
Description
Create a personalized crystal initial ornament using clear epoxy resin and glitter, perfect for home decor or gifts.
Materials
- 1 clear plastic initial ornament mold
- 2 cups clear epoxy resin
- 3 tablespoons iridescent glitter flakes
- 1 silver metal jump ring
- 10 inches satin ribbon
Instructions
- Prepare your workspace in a clean and well-ventilated area.
- Mix the epoxy resin according to package instructions until smooth.
- Add the iridescent glitter flakes to the resin mixture and fold gently.
- Pour the glitter-flake resin into the plastic initial mold carefully.
- Cure the ornament undisturbed for about 24 hours in a dust-free environment.
- Release the ornament from the mold and sand any rough edges, then attach the jump ring and ribbon for hanging.
Notes
Use a stir stick to mix thoroughly, and prevent bubbles by tapping the mold sides. Experiment with colors for a shimmering effect.