

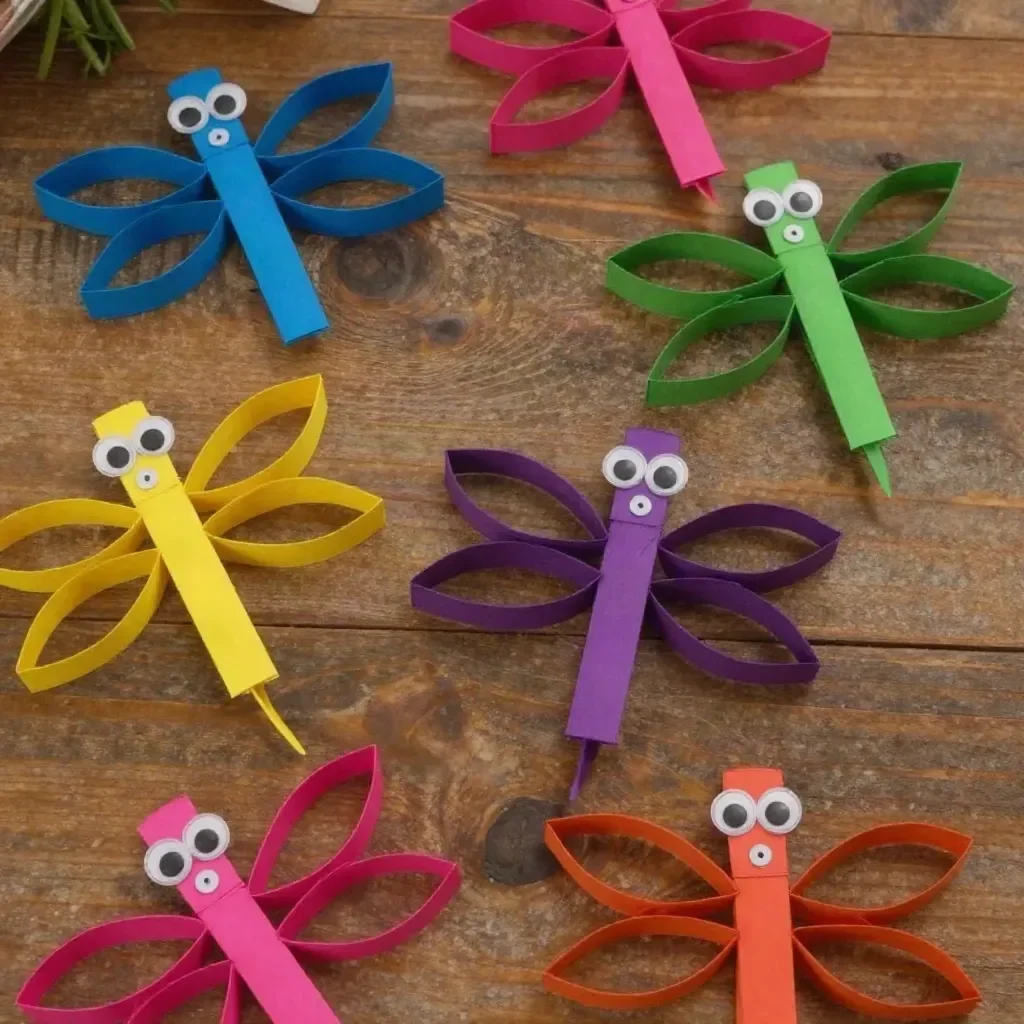
Paper Roll Dragonfly Wall Décor
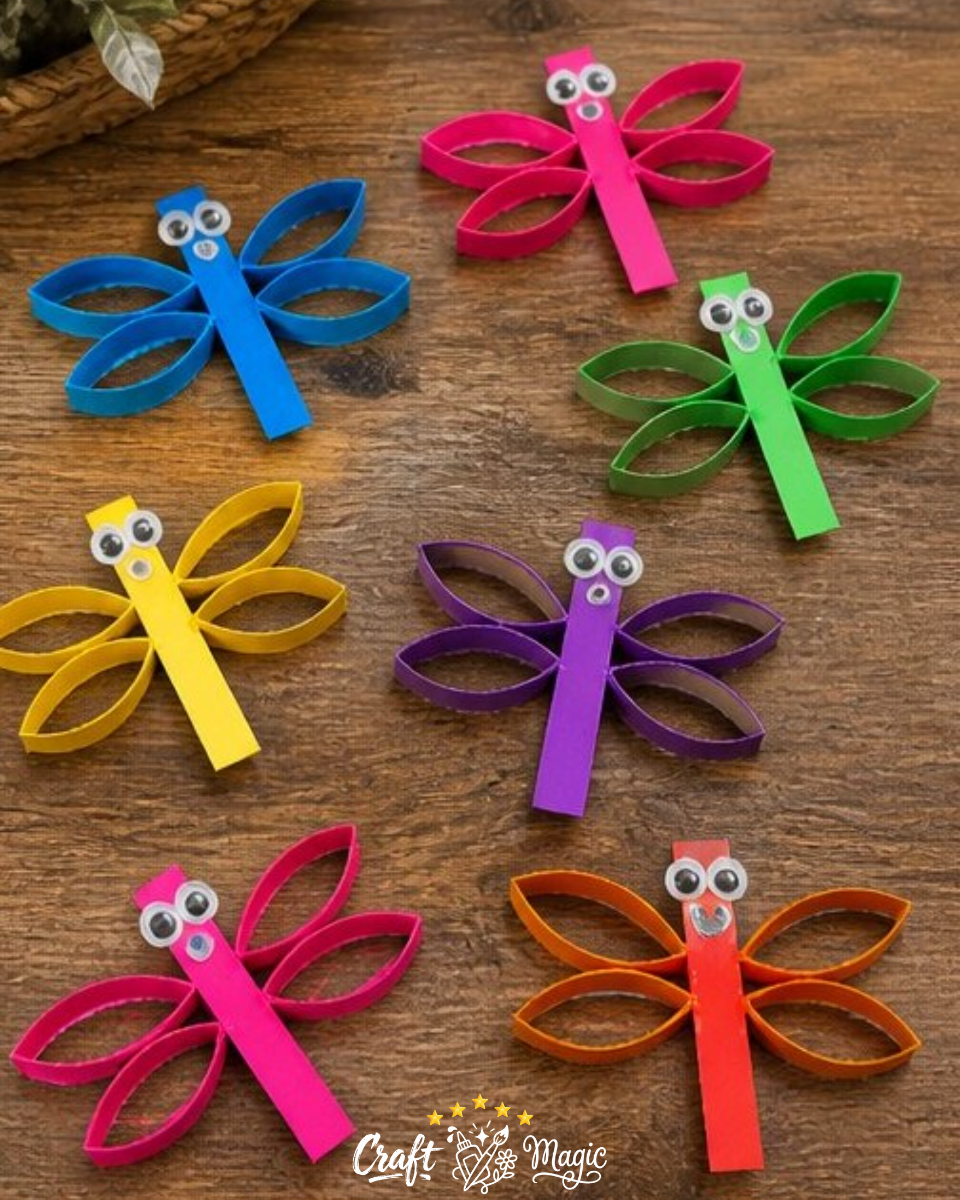
Transforming simple cardboard rolls into charming dragonfly wall décor is a delightful way to bring a touch of whimsy into your home. This project is not only visually striking but also easy for kids and families to tackle together. With just a few materials like cardboard rolls, scissors, acrylic paint, cardstock, and googly eyes, you can create beautiful decorations that will add color and personality to your space.
Materials You’ll Need
Gather the following items to start your crafting adventure:
- Cardboard rolls
- Scissors
- Acrylic paint
- Cardstock
- Glue
- Googly eyes
- Removable wall adhesive
These materials are commonly found around the house, making this project both accessible and convenient.
Why You’ll Love This Project
This paper roll dragonfly décor is unique because it invites creativity through color choices and embellishments. The process of cutting, painting, and assembling not only results in beautiful art but also provides an excellent opportunity to engage children in crafting. The finished dragonflies can gracefully hold a space on your walls, creating a playful atmosphere.
By following similar DIY steps, you can explore other creative ideas like making colorful lanterns to complement your dragonflies.
Step-by-Step Instructions
Prepare Your Workspace: Start by gathering all materials and setting up a clean, organized workspace. An uncluttered area helps streamline the crafting process.
Cut the Cardboard Rolls: Using scissors, cut the cardboard rolls into rings. Each ring will form the wings of your dragonfly. Pinch them into shapes that resemble wings, giving them a whimsical flair.
Paint the Wings: Choose vibrant acrylic paint colors for your wings. You might want to go with a rainbow theme or solid colors. Apply the paint generously and allow the wings to dry completely. This step is particularly satisfying, as the colors pop beautifully against the cardboard.
Assemble the Body and Wings: Cut a narrow strip of cardstock to serve as the dragonfly’s body. Use glue to attach four painted wings to the top of the body, two on each side. This creates a lovely layered effect.
Add the Finishing Touches: Glue googly eyes onto the body of the dragonfly to bring it to life. The added whimsy of the googly eyes will make your dragonfly even more charming.
Display Your Artwork: Use removable wall adhesive to arrange the dragonflies on your chosen wall. You can design a delightful tableau by spacing them in various positions or even grouping them together.

Helpful Tips
Choose Your Colors Wisely: Consider colors that match your home decor. Soft pastels might work well in a nursery, while bolder hues can make a statement in a playroom or living area.
Thickness Matters: If possible, use thicker cardboard rolls for added stability during the cutting and assembling process.
Crafting with Kids: Involve children in every step. From painting to gluing, it encourages them to express their creativity. Just supervise them with scissors and glue for safety!
Common Mistakes to Avoid
Skipping the Drying Step: Allow the paint to dry completely before moving on to assembly. Rushing can lead to smudged colors and sticky situations.
Not Pinching the Wings Correctly: Ensure that you pinch the wings to create a lovely shape. This will enhance the visual appeal of your dragonflies.
Over-Loading with Glue: Use a moderate amount of glue; too much can lead to messy results.
Frequently Asked Questions
How can I store my dragonfly decorations?
Once crafted, you can hang your dragonflies or carefully store them flat in a box to prevent bending.
Can I use recycled materials beyond cardboard rolls?
Absolutely! Various materials like plastic bottles or old magazines can be used creatively to form different bodies and wings.
What if I want to make the wings more colorful?
Feel free to experiment with a blend of colors or even use patterned paper for a vibrant effect!
Final Thoughts
Creating a Paper Roll Dragonfly Wall Décor is not just a fun craft; it’s a way to brighten up your environment with handmade charm. Customize your dragonflies to suit your style, and don’t hesitate to explore other creative projects.
Conclusion
This imaginative project can be a wonderful addition to your home décor. You might also want to check out this wall hanging toilet paper roll holder with cute dragonfly design for a functional yet beautiful accent that perfectly complements your crafted masterpieces!
Print
Paper Roll Dragonfly Wall Décor
- Total Time: 15 minutes
- Makes: Multiple dragonfly decorations
Description
Transform simple cardboard rolls into charming dragonfly wall décor that adds whimsy and color to your home.
Materials
- Cardboard rolls
- Scissors
- Acrylic paint
- Cardstock
- Glue
- Googly eyes
- Removable wall adhesive
Instructions
- Prepare your workspace by gathering all materials and setting up an organized area.
- Cut the cardboard rolls into rings to form the wings of your dragonfly.
- Paint the wings with vibrant acrylic colors and let them dry completely.
- Assemble a narrow strip of cardstock for the dragonfly’s body and glue on the painted wings.
- Add googly eyes to the body for a charming effect.
- Display your artwork on the wall using removable adhesive.
Notes
Choose a variety of colors and involve kids in the crafting process for a fun family activity.