

How to Grow Crystal Geodes in Red Eggshells
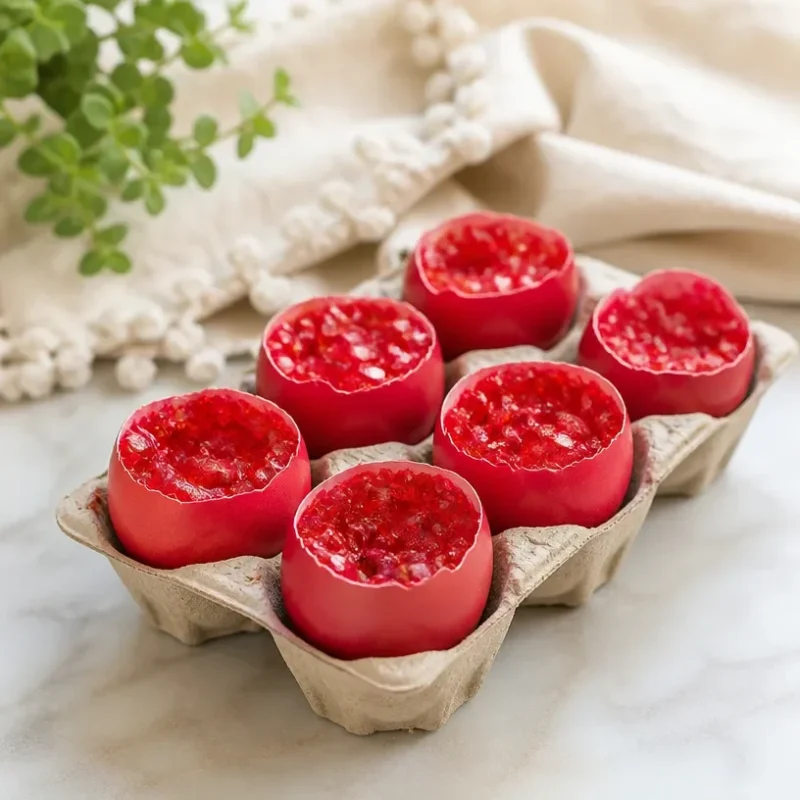
Growing crystal geodes in red eggshells is a beautifully creative project that transforms ordinary materials into stunning works of art. This craft not only delivers vibrant jewel-like crystals but also provides a captivating experience that you and your family can enjoy together. The finished product is visually striking, featuring a mix of colors that can decorate your home or serve as a unique gift. By following a few simple steps, you can achieve impressive results with minimal materials. You may also find Borax Rainbow Crystal Bloom Tree Garden Decor useful.
You may also find Bunny Flower Pot Covers Diy Tutorial Spring Decor useful.
Materials You’ll Need
To get started, gather the following materials: You may also find Coffee Filter Rainbow Roses Diy Tutorial useful.
- Red eggshells (carefully cleaned and dried)
- Borax (a key ingredient for crystal formation)
- Water
- Food coloring (optional, for customized colors)
- Small container or cup (to mix the solution)
- Stirring stick or spoon
- Wax paper (for drying the geodes)
Let’s dive into the process of making beautiful crystal geodes using your gathered materials! You may also find Colorful Cupcake Liner Witch Hat Flowers Tutorial useful.
How to Make Crystal Geodes in Red Eggshells
Step-by-Step Instructions
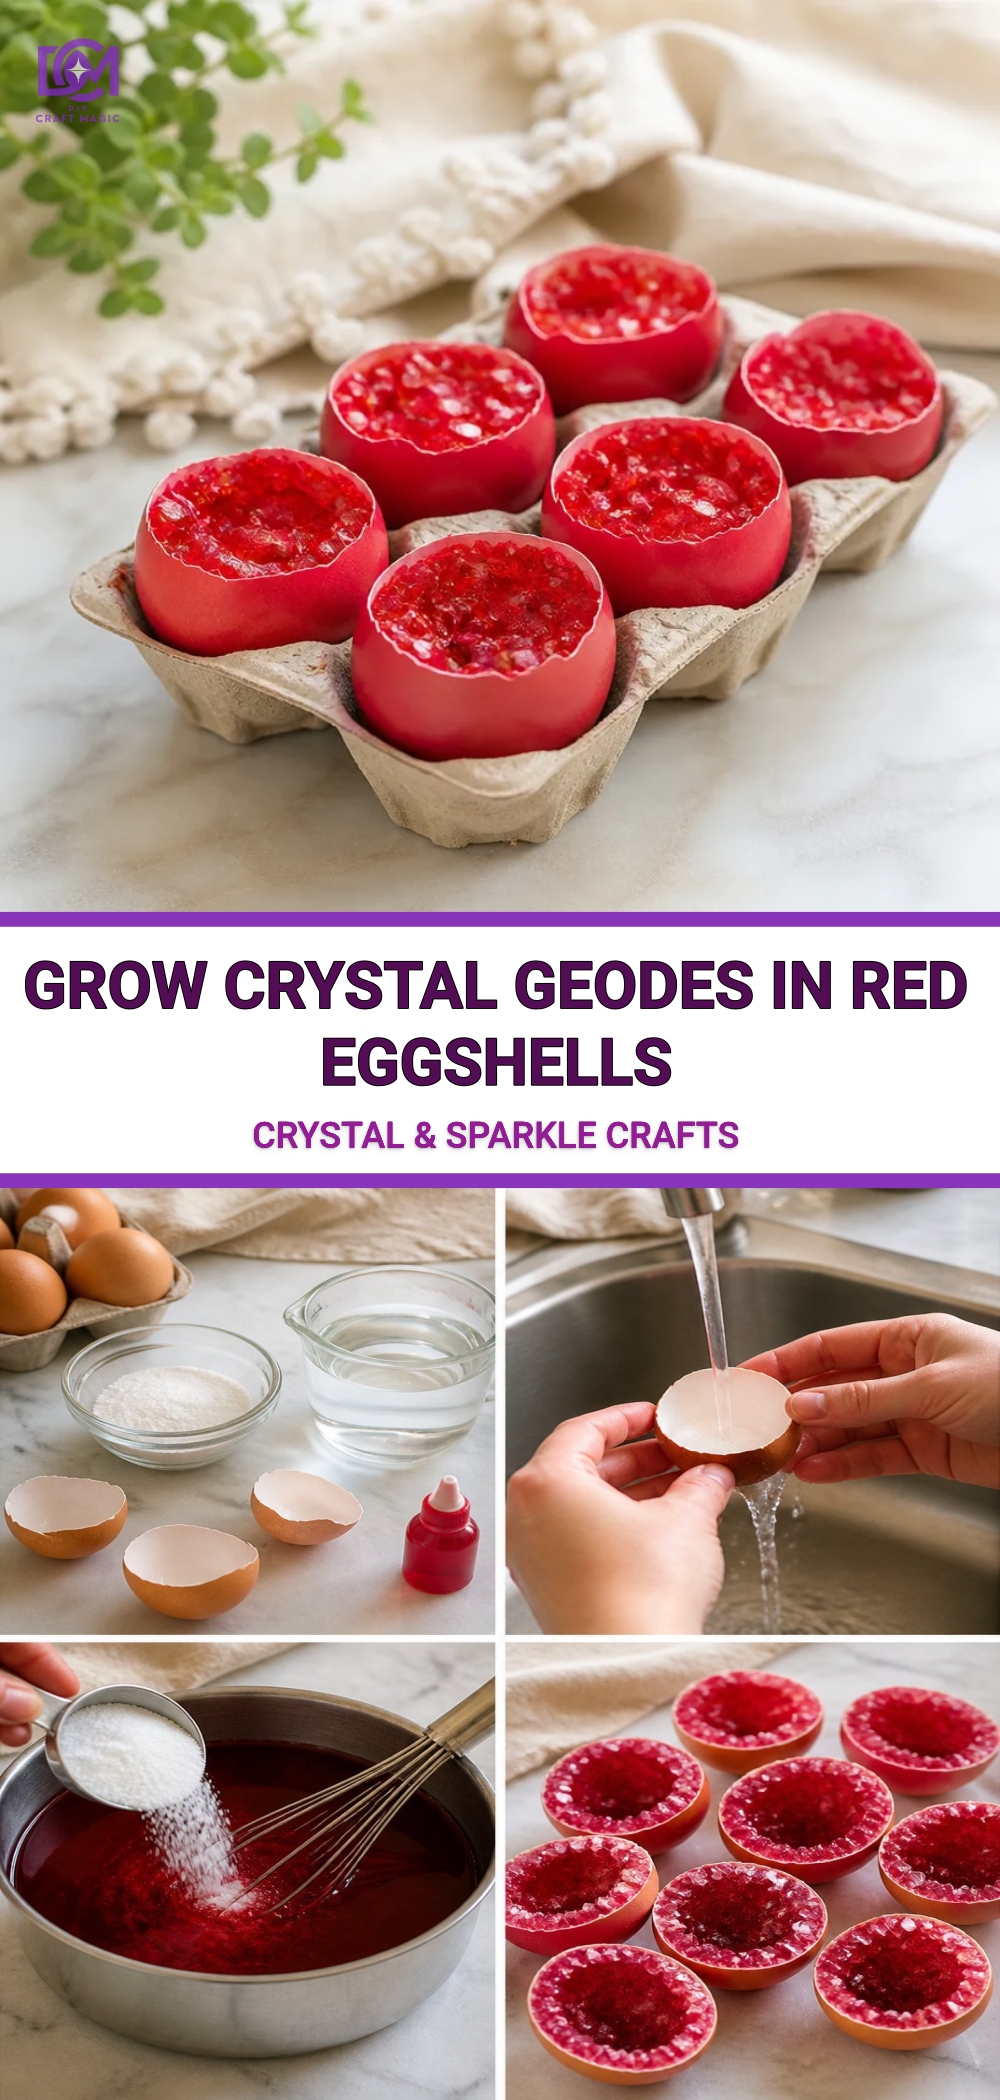
Prepare the Eggshells: Carefully crack the eggshells and rinse them to remove any residual egg. Set them aside to dry completely. To enhance your project, you can use red eggshells to give a vibrant look to your geodes.
Mix the Solution: In a small container, combine 1 cup of water with about ¼ cup of borax. Heat the water until it is almost boiling, then stir in the borax until dissolved. If you want your crystals to have specific colors, add drops of food coloring into the solution and mix gently to avoid bubbles.
Fill the Eggshells: Once your solution is mixed, carefully pour it into the prepared eggshells. Fill them to the top but leave a little space to prevent overflow.
Let Them Sit: Place the filled eggshells on a piece of wax paper or in a safe spot where they won’t be disturbed. Allow the mixture to cool and then wait for the crystals to form for about 24 hours.
Observe the Crystallization: After a day, check on your crystals! You should see them forming at the bottom and throughout the mixture, creating a dazzling effect. Gently remove the eggshells from the wax paper, being careful not to break them.
Display Your Creations: Once the crystals have dried completely, you can display your gorgeous geodes. They can be placed in a sunny window, or grouped on a shelf to catch the light. For more fun craft ideas, consider trying crystal cloud raindrops as a complementary project.
Getting the Colors Right
Selecting the right food coloring can significantly affect the appearance of your geodes. Mixing different colors can create stunning effects, so don’t hesitate to experiment! For example, a blend of blue and green can provide a sea-like feel, while red and yellow can yield a warm sunset look.
Creating the Crystal Effect
Make sure to keep the environment around your geodes stable while the crystals grow. Fluctuations in temperature or movement can disrupt their formation. For best results, consider placing your eggshells in a calm space and avoiding direct drafts.
Helpful Tips
- If you want to enhance the texture of your geodes, you might want to try using different sizes of borax granules. This will create a more varied crystal structure.
- For a fun twist, you can decorate the outside of the shells with glitter or paint before filling them with the solution. This adds a personalized touch!
- Make sure to check on your crystals halfway through the growing process to see how they’re developing and ensure your work is progressing as expected.
Common Mistakes to Avoid
- Using Too Much Water: Ensure you have the correct ratio of water to borax. Too much water can dilute the solution and prevent proper crystal growth.
- Not Cleaning the Eggshells Thoroughly: Any remaining egg residue can interfere with crystal formation.
- Ignoring Temperature Fluctuations: Keep the geodes in a stable environment to encourage even crystal growth.
Frequently Asked Questions
Can I use other containers instead of eggshells?
Yes! While eggshells are a fun and creative choice, you can use small plastic or glass containers to create crystals.
How long do the crystals last?
With proper care, your crystals can last indefinitely. Display them in areas away from direct sunlight to prevent fading.
Can I eat the leftover eggs?
Yes! If you’ve cleaned the eggshells thoroughly, you can save the remaining egg to use in your cooking.
What if I don’t have borax?
Borax is essential for this project; however, if you can’t find it, consider researching alternative crystal-growing methods.
Is this project suitable for children?
Absolutely! It’s a great way to engage children in a fun science experiment, though adult supervision is recommended for handling hot water and borax.
Conclusion
Crafting crystal geodes in red eggshells not only fosters creativity but also provides educational opportunities about crystallization and science. By exploring and experimenting with different colors and designs, you can make a spectacular display for your home or share with friends. For additional resources on crafting with crystals, check out How to Grow Your Own Crystal Geodes and learn more about the exciting world of crystals! Also, if you’re interested in making beautiful crystal eggs, take a look at How to Make Crystal Eggshell Geode Chemistry Science Experiment. Happy crafting!
Print
How to Grow Crystal Geodes in Red Eggshells
- Total Time: 1455 minutes
- Makes: N/A
Description
A captivating project that transforms red eggshells into stunning crystal geodes using simple materials.
Materials
- Red eggshells (carefully cleaned and dried)
- ¼ cup Borax (a key ingredient for crystal formation)
- 1 cup Water
- Food coloring (optional, for customized colors)
- Small container or cup (to mix the solution)
- Stirring stick or spoon
- Wax paper (for drying the geodes)
Instructions
- Prepare the eggshells: Carefully crack the eggshells and rinse them to remove any residual egg. Set them aside to dry completely.
- Mix the solution: In a small container, combine 1 cup of water with about ¼ cup of borax. Heat the water until it is almost boiling, then stir in the borax until dissolved. Add food coloring as desired.
- Fill the eggshells: Carefully pour the mixture into the prepared eggshells, leaving a little space to prevent overflow.
- Let them sit: Place the filled eggshells on wax paper and allow the mixture to cool. Wait for the crystals to form for about 24 hours.
- Observe the crystallization: After a day, check for crystal formation at the bottom and throughout the mixture.
- Display your creations: Once the crystals have dried completely, display your geodes in a sunny window or on a shelf.
Notes
Experiment with different colors of food coloring for unique effects and ensure a stable environment for optimal crystal growth.