
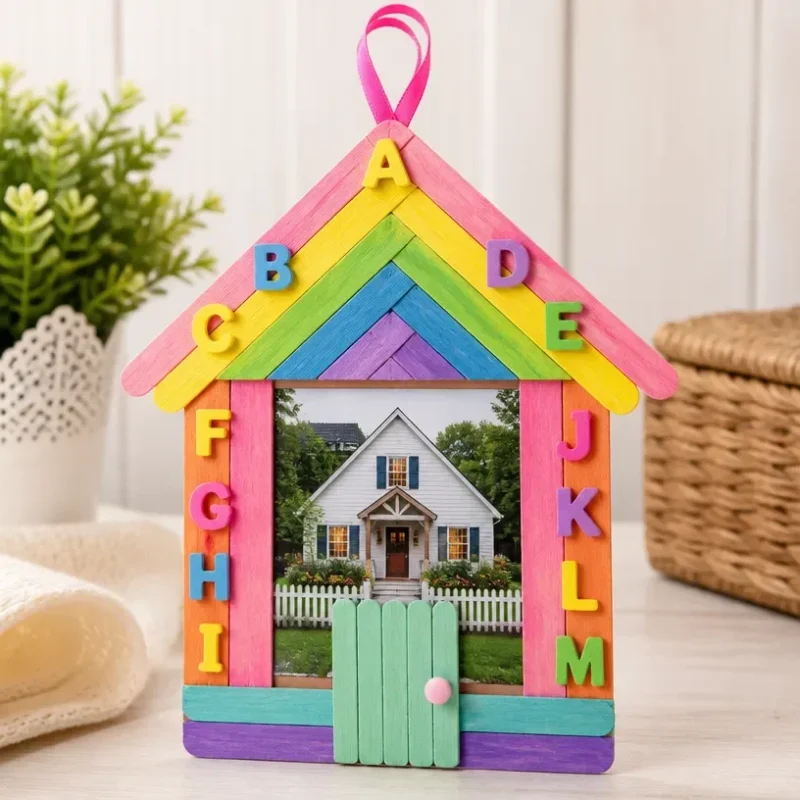
Create a Rainbow Craft-Stick Photo Frame for Schoolhouse Decor
Transform simple craft sticks into a colorful and vibrant photo display with this DIY Rainbow Craft-Stick Photo Frame. This project is not only visually striking but also offers a satisfying crafting experience, especially for families or classrooms. The final product showcases a rainbow of colors, making it a perfect addition to schoolhouse decor or a delightful gift for teachers. You may also find Borax Rainbow Crystal Bloom Tree Garden Decor useful.

You may also find Colorful Ocean Jar Decor Rainbow Glass Jar Coastal Homes useful.
Why You’ll Love This Project
Crafting this rainbow photo frame is an incredibly fun way to engage creativity while creating something functional. The bright colors of the craft sticks lend themselves to personalization, allowing you to express your style or the personalities of the children involved. You can also adapt this project for different seasons or themes, much like the colorful decorations in our colorful lantern project.
Materials You’ll Need
Gather the following materials to create your rainbow craft-stick photo frame: You may also find Colorful Rainbow Feather Window Decor Artwork useful.
- Craft sticks (various colors)
- Glue (white school glue or hot glue)
- Scissors
- A piece of cardboard or a standard picture frame back
- Decorative embellishments (optional)
- Paint (optional if you want to personalize further)
Step-by-Step Instructions
Follow these steps to create your Rainbow Craft-Stick Photo Frame:
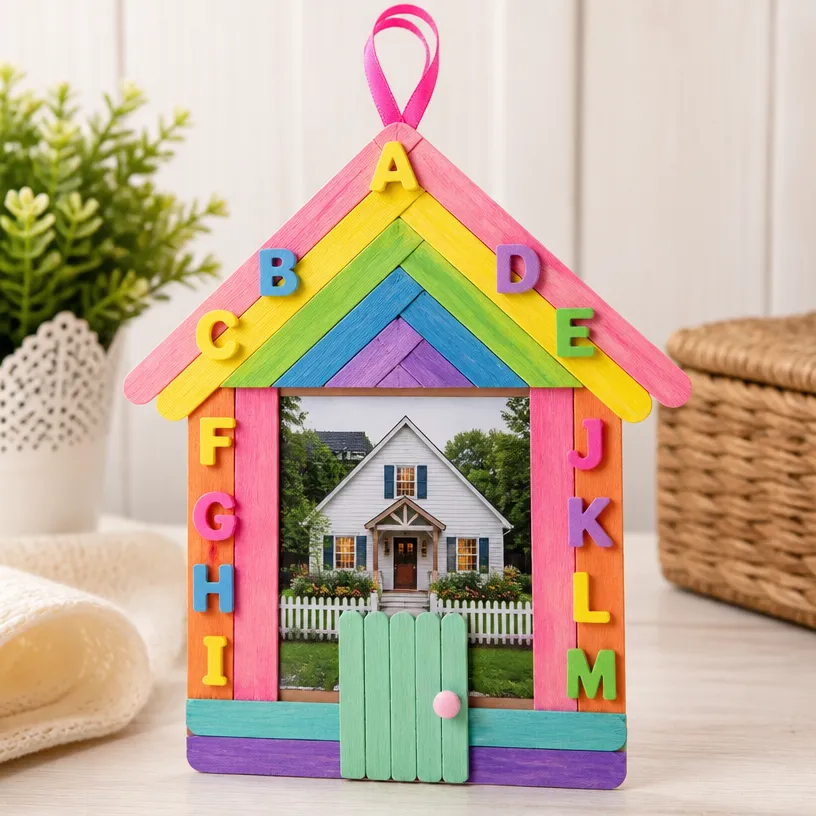
Prepare the Frame Base: Start by cutting your cardboard or frame back to the desired size for your photograph. Ensure it’s sturdy enough to hold the frame.
Select Your Craft Sticks: Choose a variety of colored craft sticks to create a vibrant rainbow effect. You might opt for more reds and oranges at the bottom, transitioning through yellows, greens, blues, and purples at the top.
Arrange the Sticks: Lay out the craft sticks on your cardboard base in the order you like them. This can help visualize the design and ensure colors are balanced.
Glue the Craft Sticks: Start gluing the craft sticks onto the cardboard. Apply glue along the edge of each stick and press it firmly onto the base. Be cautious with the hot glue, as it can burn if you’re using that method. A great option to explore if you love colored designs is the DIY rainbow mandala stones project.
Decorate: If desired, embellish your frame with additional decorative items. Stickers, glitter, or even small gems can add a fun touch.
Insert Your Photo: Once the glue has dried, carefully cut out an opening in the center (if not using a picture frame back) that fits your photo size.
Display Your Frame: Finally, find a perfect spot for your finished frame! Consider showing it off at school, in your home, or as a thoughtful gift.
Helpful Tips
- Encourage children to pick their favorite colors, which can make the project feel more personal.
- This craft can be easily adapted for various holidays by changing the color themes.
- To enhance the visual appeal, consider painting some sticks in metallic colors or adding a glossy finish.
Common Mistakes to Avoid
- Avoid using too much glue, as it may create a mess or lead to waiting longer for drying times.
- Ensure the craft sticks are placed evenly to create a balanced frame look. You might want to practice your arrangement before committing to gluing.
Ways to Customize It
You can customize your craft-stick photo frame in several ways:
- Colors: Tailor the craft stick colors to suit specific themes (e.g., pastels for Easter, vibrant colors for summer, etc.).
- Size: Make the frame larger or smaller depending on the desired display size.
- Shape: Instead of a rectangular frame, explore creating shapes like heart or star frames for a unique twist.

Frequently Asked Questions
How Long Does It Take to Complete?
Typically, this project should take around 1-2 hours from start to finish, depending on drying times and complexity.
What If I Don’t Have Craft Sticks?
If craft sticks are unavailable, you could substitute with cardboard cutouts or even painted wooden pieces.
Can Kids Do This Without Supervision?
While many aspects are safe for children, particularly if using scissors or hot glue, it’s recommended that an adult supervise young children during the crafting process.With a little creativity and simple materials, you can craft a delightful rainbow photo frame that adds joy and warmth to any space. This project opens the door to various color combinations and styles, making it a fantastic choice for family projects or educational settings.
Conclusion
This Rainbow Craft-Stick Photo Frame project is a wonderful way to encourage creativity and practical skills in children and adults alike. If you’re on the lookout for fun craft ideas, you may also enjoy a Schoolhouse Picture Frame Magnet for a different take. Additionally, consider reviewing your homeschool supply list for more creative inspiration and supplies needed for crafting on future projects.
We hope you enjoy making this colorful addition to your home!
Print
Rainbow Craft-Stick Photo Frame
- Total Time: 60 minutes
- Makes: 1 photo frame
Description
Transform simple craft sticks into a colorful and vibrant photo display with this DIY Rainbow Craft-Stick Photo Frame, perfect for schoolhouse decor.
Materials
- Craft sticks (various colors)
- Glue (white school glue or hot glue)
- Scissors
- A piece of cardboard or a standard picture frame back
- Decorative embellishments (optional)
- Paint (optional)
Instructions
- Prepare the frame base: Start by cutting your cardboard or frame back to the desired size for your photograph.
- Select your craft sticks: Choose a variety of colored craft sticks for a vibrant rainbow effect.
- Arrange the sticks: Lay out the craft sticks on your cardboard base to visualize the design.
- Glue the craft sticks: Apply glue along the edge of each stick and press it firmly onto the base.
- Decorate: Embellish your frame with stickers, glitter, or small gems.
- Insert your photo: Cut out an opening in the center that fits your photo size (if not using a picture frame back).
- Display your frame: Find a perfect spot to showcase your finished frame!
Notes
Encourage children to pick their favorite colors for personalization. Avoid using too much glue to prevent mess.