


Colorful DIY Crafts Using Clear School Glue
Get ready to transform ordinary materials into vibrant, shimmering crafts with clear school glue! This project allows you to create stunning window decorations or beautiful art pieces that play with light and color. The end results are not just visually captivating but also provide a satisfying hands-on making experience. This approachable craft will inspire your creativity and can be enjoyed by crafters of all ages. For more unique decor ideas, you might want to explore the DIY colorful rainbow mandala window decor as well.
Why You’ll Love This Project
Using clear school glue as a primary material opens up a world of colorful possibilities. The glue dries clear, allowing you to create designs that are both glossy and translucent. This characteristic makes it perfect for suncatchers and other decorative crafts where light plays a role. Plus, the ability to incorporate various pigments and materials provides a great way to customize your designs to suit any season or occasion. You may also find Colorful Rainbow Mug Craft Quick Diy Magic Reveal useful.
Materials You’ll Need
Before you start crafting, gather the following supplies: You may also find Galaxy Bubble Glue Diy Window Art useful.

You may also find Rainbow Ice Gem Excavation Diy Colorful Ice Gems useful.
- Clear school glue
- Food coloring or liquid watercolors
- Wax paper or a plastic sheet
- Paintbrushes or squeeze bottles
- Scissors
- A round object (like a plate or a bowl) for tracing circles
- (Optional) Glitter, beads, or additional embellishments
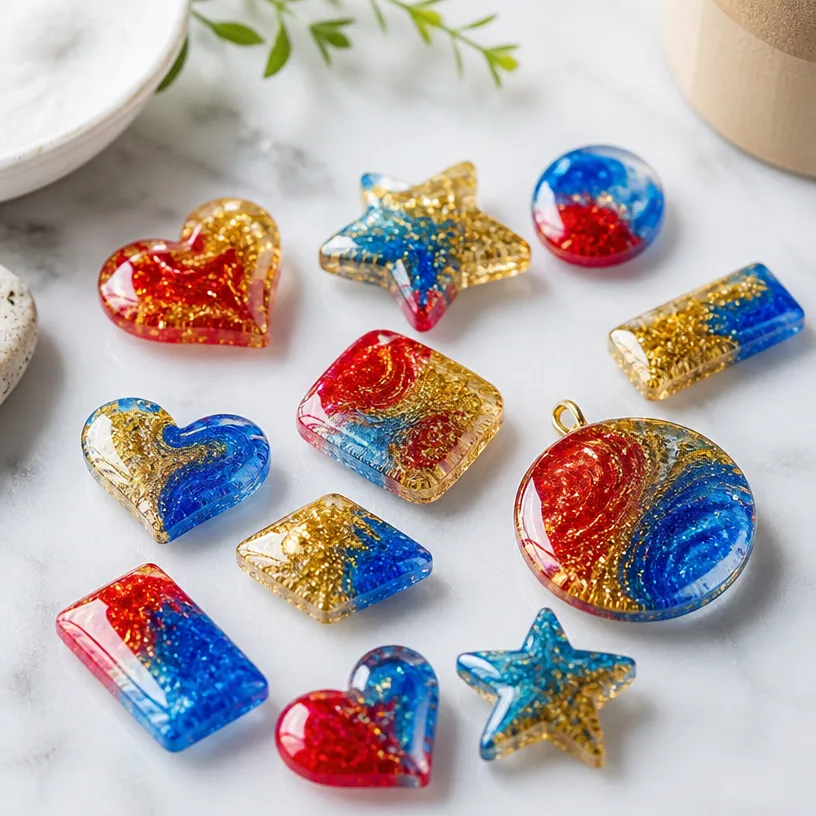
How to Make Colorful DIY Crafts Using Clear School Glue
Crafting with clear school glue is simple, yet the outcomes can be remarkable. Here’s a step-by-step guide to creating your colorful art.
Prepare Your Workspace: Start by laying down wax paper or a plastic sheet over your working area to prevent mess and help with easy clean-up later.
Mix Your Colors: In small containers, mix clear glue with various food coloring or liquid watercolors. The more you add, the more vibrant your final color will be.
Trace Your Base Design: Using your round object, trace circles or any shape onto the wax paper. This will serve as a guideline for your glue designs.
Create Your Design: With your paintbrush or squeeze bottle, start applying your colored glue within the traces. Feel free to experiment with layering colors or incorporating glitter and beads for added sparkle.
Let it Dry: Allow the glue artwork to dry completely. This can take several hours to overnight, depending on the thickness of the glue layer.
Peel Off and Display: Once dried, gently peel your creation off the wax paper. You now have a beautiful suncatcher! Hang it in windows or use it as a decorative element in various spaces.
For tips on additional fun projects, take a look at the Clear Blue Rainbow Bat Suncatcher Wreath DIY. It’s a great way to incorporate seasonal themes into your craft.
Helpful Tips for Success
- Experiment with Techniques: Try different application techniques, such as dotting or swirling the glue, to create unique textures.
- Make It Seasonal: Change up your color choices for different seasons use pastels for spring or rich hues for fall.
- Add 3D Elements: Embellishments like beads or sequins can add dimension to your craft. Just make sure they are securely attached in the glue.
Common Mistakes to Avoid
- Too Thick Layers: Applying glue too thickly can lead to long drying times or cause the artwork to warp. Keep layers thin for the best results.
- Skipping the Wax Paper: Remember, working directly on surfaces can cause your glue design to stick to them. Always use wax paper or a similar barrier.
Ways to Customize Your Craft
Aside from colors and shapes, consider the following customization ideas for your crafts:
- Shape Variations: Use cookie cutters to make various designs like stars, hearts, or other seasonal shapes.
- Layering Colors: Try layering different colors in your designs to create a marbled effect.
- Seasonal Touches: Incorporate themed embellishments depending on the time of year, such as leaves for autumn or snowflakes for winter.
Display Ideas
Once your crafts are complete, think creatively about how to display them. Suncatchers look beautiful in windows where sunlight can enhance their colors. Alternatively, frame your designs or use them as part of a seasonal decoration theme around your home.
Crafting With Kids
This project is perfect for family crafting time! Engage your children in the creative process, letting them choose their colors and designs. Make sure to supervise them while using scissors or any sharp tools, and encourage them to explore their artistic sides.
Frequently Asked Questions
What can I use if I don’t have liquid watercolors?
You can easily substitute with food coloring or even markers by adding a bit of water to thin it out.
How long will it take to dry completely?
Drying times can vary based on the thickness of the glue used, but generally expect a few hours to overnight for full drying.
Can I use other types of glue?
While clear school glue is ideal for this project, alternatives like clear craft glue can also be used, though results may vary.
Conclusion
Crafting with clear school glue can lead to a wonderful array of colorful creations. If you’re looking to expand your glue crafting repertoire, check out this detailed guide on how to make faux stained glass with acrylic paint and glue or explore the delightful Colorful DIY Glue Suncatcher Craft for more creative ideas. Enjoy the process and let your imagination shine as you embark on this colorful journey!
Print
Colorful DIY Crafts Using Clear School Glue
- Total Time: 15 minutes
- Makes: 1 craft project
Description
Transform ordinary materials into vibrant, shimmering crafts using clear school glue.
Materials
- Clear school glue
- Food coloring or liquid watercolors
- Wax paper or a plastic sheet
- Paintbrushes or squeeze bottles
- Scissors
- A round object (like a plate or a bowl) for tracing circles
- (Optional) Glitter, beads, or additional embellishments
Instructions
- Prepare your workspace: Start by laying down wax paper or a plastic sheet over your working area.
- Mix your colors: In small containers, mix clear glue with various food coloring or liquid watercolors.
- Trace your base design: Using your round object, trace circles or any shape onto the wax paper.
- Create your design: With your paintbrush or squeeze bottle, start applying your colored glue within the traces.
- Let it dry: Allow the glue artwork to dry completely for several hours to overnight.
- Peel off and display: Once dried, gently peel your creation off the wax paper and hang it or use it as decoration.
Notes
Experiment with different application techniques for unique results and have fun customizing your designs according to the season.