


DIY Rainbow Apple Mosaic for Back-to-School
Creating a DIY Rainbow Apple Mosaic is a wonderful way to celebrate the back-to-school season. This colorful project turns simple materials into a vibrant apple-shaped mosaic that serves as a perfect decoration for classrooms or your home. The finished product dazzles with colors and intricacies, making it an excellent craft for families, teachers, or anyone looking to add a splash of joy to their space. Plus, the crafting process is satisfying and educational, allowing crafters to explore color blending and design principles. You may also find Diy Rainbow Mandala Stones For Home Decor useful.
Why You’ll Love This Project
This engaging project not only brings the excitement of a new school year but also challenges your creativity as you design your own unique apple mosaic. The final piece is not only visually appealing, but it also serves as a great teaching moment for kids to learn about colors and shapes. If you’re looking for a project that complements the DIY Rainbow Apple Mosaic, you might be interested in making a Rainbow Apple Cupcake Liner Flower Wreath for Kids.
Materials You’ll Need
Before starting, gather the following materials: You may also find Pineapple Rainbow Garland Diy Summer Parties useful.
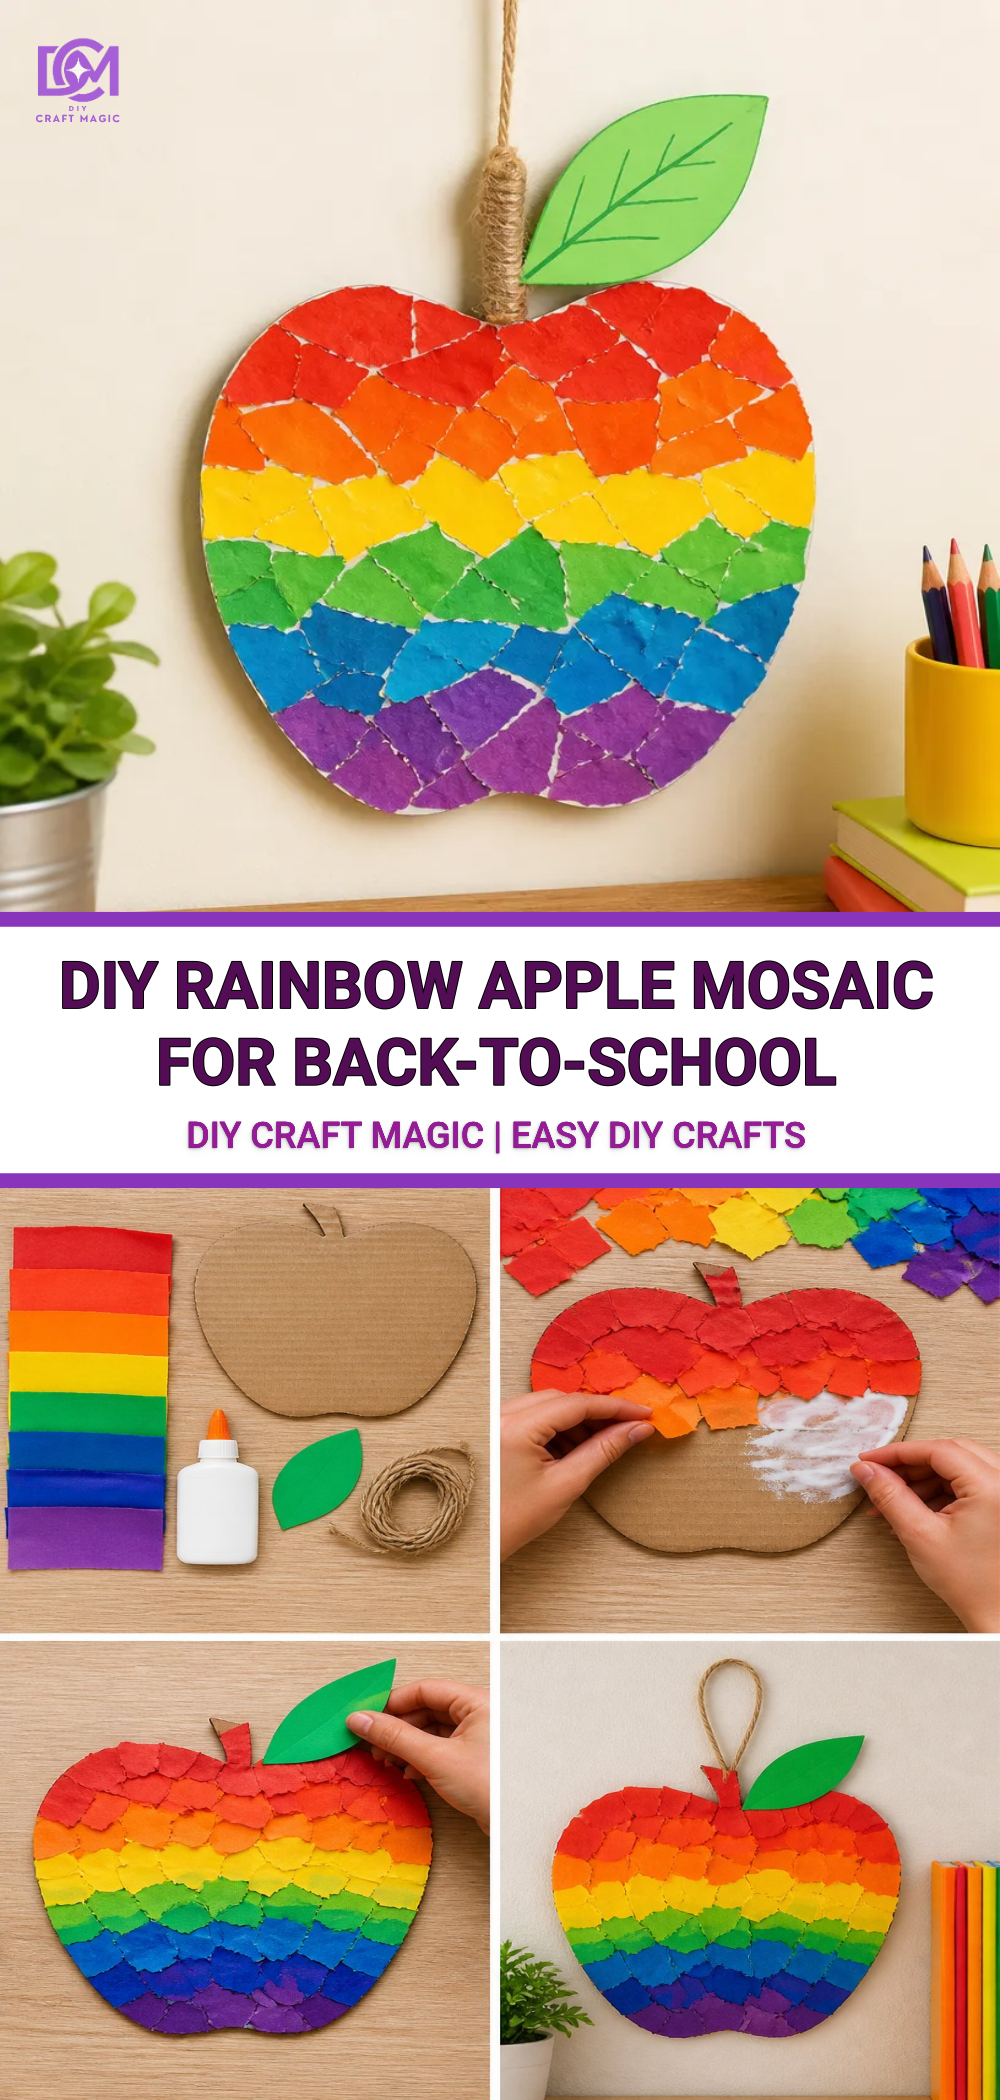
You may also find Rainbow Monster Pencil Holders Diy Craft For Kids useful.
- Colored paper (red, green, yellow, blue)
- Scissors
- Glue (school or craft glue)
- A wooden or cardboard base (apple-shaped)
- Paintbrush (optional for spreading glue)
- Pencil for drawing outlines
- Slicing knife (if cutting shapes from thick paper)
- Optional: Googly eyes or other decorations
Choosing Your Materials
When selecting colored paper, consider using a mix of glossy and matte finishes to add depth to your mosaic. Bright colors will make the apple pop, while muted tones can be used for shading or background details. If you want to enhance your project, you could look into additional embellishments like glitter or stickers. You may also find Rainbow Tissue Paper Flower Lantern Diy For Kids useful.
How to Make DIY Rainbow Apple Mosaic for Back-to-School
Follow these clear step-by-step instructions to assemble your project:
Step-by-Step Instructions
Prepare Your Base: Start by cutting your wooden or cardboard base into an apple shape. Make sure it’s sturdy enough to hold the weight of the paper mosaic.
Draw Your Design: Using a pencil, lightly sketch where you want each color to go on your apple. Planning your design will help ensure a balanced and colorful result.
Cut the Colored Paper: Cut pieces of colored paper into small squares or shapes. Varying the size of these pieces can create interesting textures on your apple mosaic.
Glue the Pieces: Apply glue to the designated areas of the apple base, and begin affixing your colored paper pieces. Start with larger areas and gradually fill in with smaller pieces. Ensure the edges of the paper overlap slightly for a seamless look.
Let It Dry: After you have filled the entire apple with paper pieces, allow it to dry completely. This may take several hours, depending on the type of glue used.
Add Details: Once dry, you can add googly eyes or other embellishments to give your apple personality. Consider drawing on a smile or adding glitter for extra flair.
Getting the Colors Right
To achieve a rainbow effect, try arranging your colored paper in a gradient pattern. Starting from the bottom with red, gradually transition to orange, yellow, green, blue, and purple at the top. This will create a visually stunning rainbow that captures attention.
Helpful Tips
- If you’re crafting with kids, supervision is essential, particularly while cutting shapes.
- Encourage children to express their creativity by using different colors and shapes.
- If the paper pieces become difficult to manipulate, using a paintbrush to apply glue can make the process easier.
Common Mistakes to Avoid
One common mistake is placing pieces too far apart, leading to harsh gaps in the design. To avoid this, always overlap the edges of each paper piece slightly. Additionally, using too much glue can make the project messy, so go for a thin layer.
Ways to Customize It
Feel free to customize your apple mosaic by using different colors or shapes of paper. You could also create a larger mural using multiple apples or create a series of fruits in a rainbow color scheme. Seasonal themes can be implemented think orange and black for Halloween!
Display Ideas
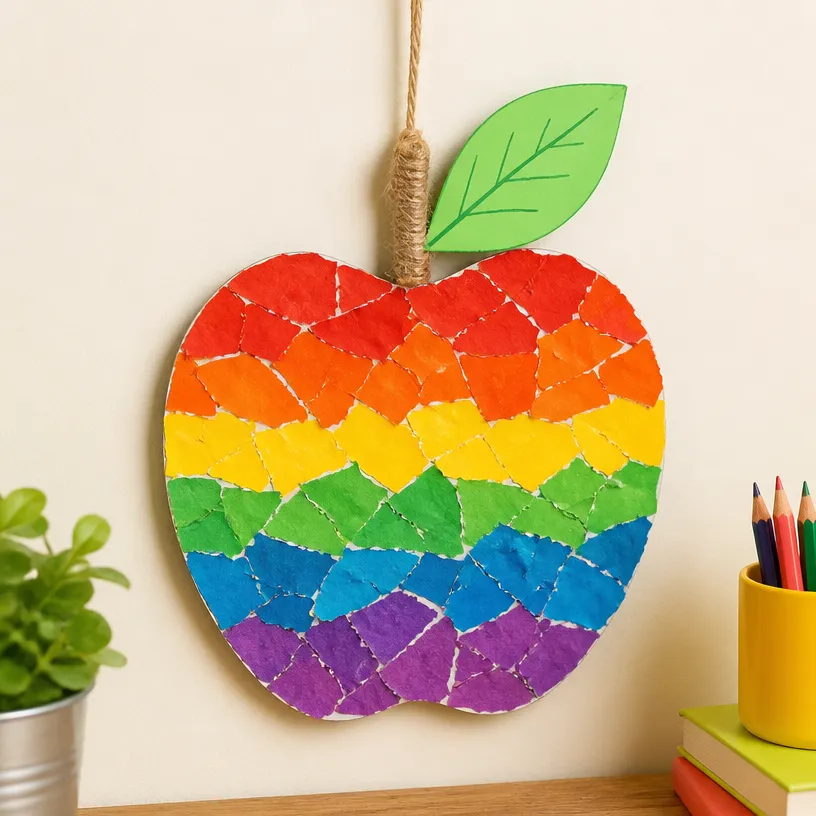
Once completed, proudly display your DIY Rainbow Apple Mosaic on a shelf, your child’s desk, or in the classroom. You can even consider incorporating it into a seasonal decoration display.
Crafting With Kids
This project is perfect for family crafting time. By inviting your children to join in, not only are you bonding, but you are also helping them develop important fine motor skills through cutting and gluing. You can also turn this into an educational experience by discussing colors and patterns.
Frequently Asked Questions
How long will it take to complete this project?
Depending on your experience and materials, it may take about 2-3 hours, including drying time.
Can I use different types of materials for the mosaic?
Absolutely! In addition to paper, you can use foam sheets, fabric scraps, or even small tiles for a different texture and effect.
How should I store the finished apple mosaic?
Store your mosaic in a cool, dry place. Avoid exposure to direct sunlight which may fade the colors over time.
Conclusion
The DIY Rainbow Apple Mosaic is a delightful project that not only brings color to your home but also offers an exciting opportunity to engage kids in crafting. To explore more artistic inspirations, check out resources like Mosaic Apple Art on Etsy for unique art ideas. Additionally, if you’re looking for a fun app that allows you and your kids to explore colors, consider downloading Colorscape: Photo to Coloring from the App Store. Happy crafting!
Print
DIY Rainbow Apple Mosaic for Back-to-School
- Total Time: 150 minutes
- Makes: 1 mosaic
Description
Create a vibrant apple-shaped mosaic using colored paper, perfect for back-to-school decorations.
Materials
- Colored paper (red, green, yellow, blue)
- Scissors
- Glue (school or craft glue)
- A wooden or cardboard base (apple-shaped)
- Paintbrush (optional for spreading glue)
- Pencil for drawing outlines
- Slicing knife (if cutting shapes from thick paper)
- Optional: Googly eyes or other decorations
Instructions
- Prepare Your Base: Start by cutting your wooden or cardboard base into an apple shape. Make sure it’s sturdy enough to hold the weight of the paper mosaic.
- Draw Your Design: Using a pencil, lightly sketch where you want each color to go on your apple.
- Cut the Colored Paper: Cut pieces of colored paper into small squares or shapes.
- Glue the Pieces: Apply glue to the designated areas of the apple base, and begin affixing your colored paper pieces.
- Let It Dry: Allow the apple to dry completely, which may take several hours.
- Add Details: Once dry, you can add googly eyes or other embellishments to give your apple personality.
Notes
Encourage kids to express their creativity by using different colors and shapes.