

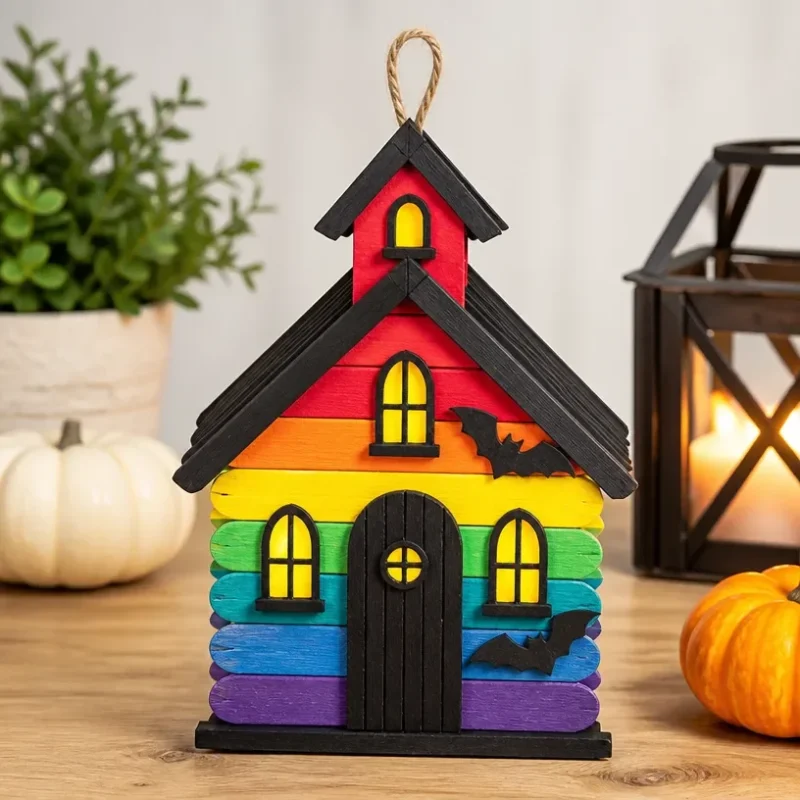
DIY Rainbow Popsicle-Stick Haunted Schoolhouse
Create a delightful and spooky addition to your Halloween decor with this DIY Rainbow Popsicle-Stick Haunted Schoolhouse craft! The vibrant colors and whimsical design will capture the imagination of both kids and adults, making it a fun project for the entire family. This hands-on craft combines the charm of rainbow colors with the thrill of Halloween, resulting in a unique home decoration that is satisfying to make. You may also find Clear Blue Rainbow Bat Suncatcher Wreath Diy useful.
Materials You’ll Need
To get started, gather the following materials for your craft project:
- Popsicle sticks (colorful, as many as you like)
- Craft paint (various colors)
- Hot glue gun and glue sticks
- Scissors
- Black construction paper (for details)
- Small decorative items (e.g., googly eyes, mini pumpkins)
- A paintbrush
- Clear adhesive spray or outdoor sealant (for durability)
Choosing Your Materials
When choosing your materials, opt for a variety of colored popsicle sticks to create the rainbow effect that will make your schoolhouse visually striking. Using a combination of both bright hues and darker shades helps to achieve a delightful contrast, perfect for a spooky Halloween theme. You’ll find that the colors really pop once the project is assembled, just like in other crafts on our site, such as the DIY Colorful Rainbow Mandala Window Decor.
How to Make DIY Rainbow Popsicle-Stick Haunted Schoolhouse
Step-by-Step Instructions
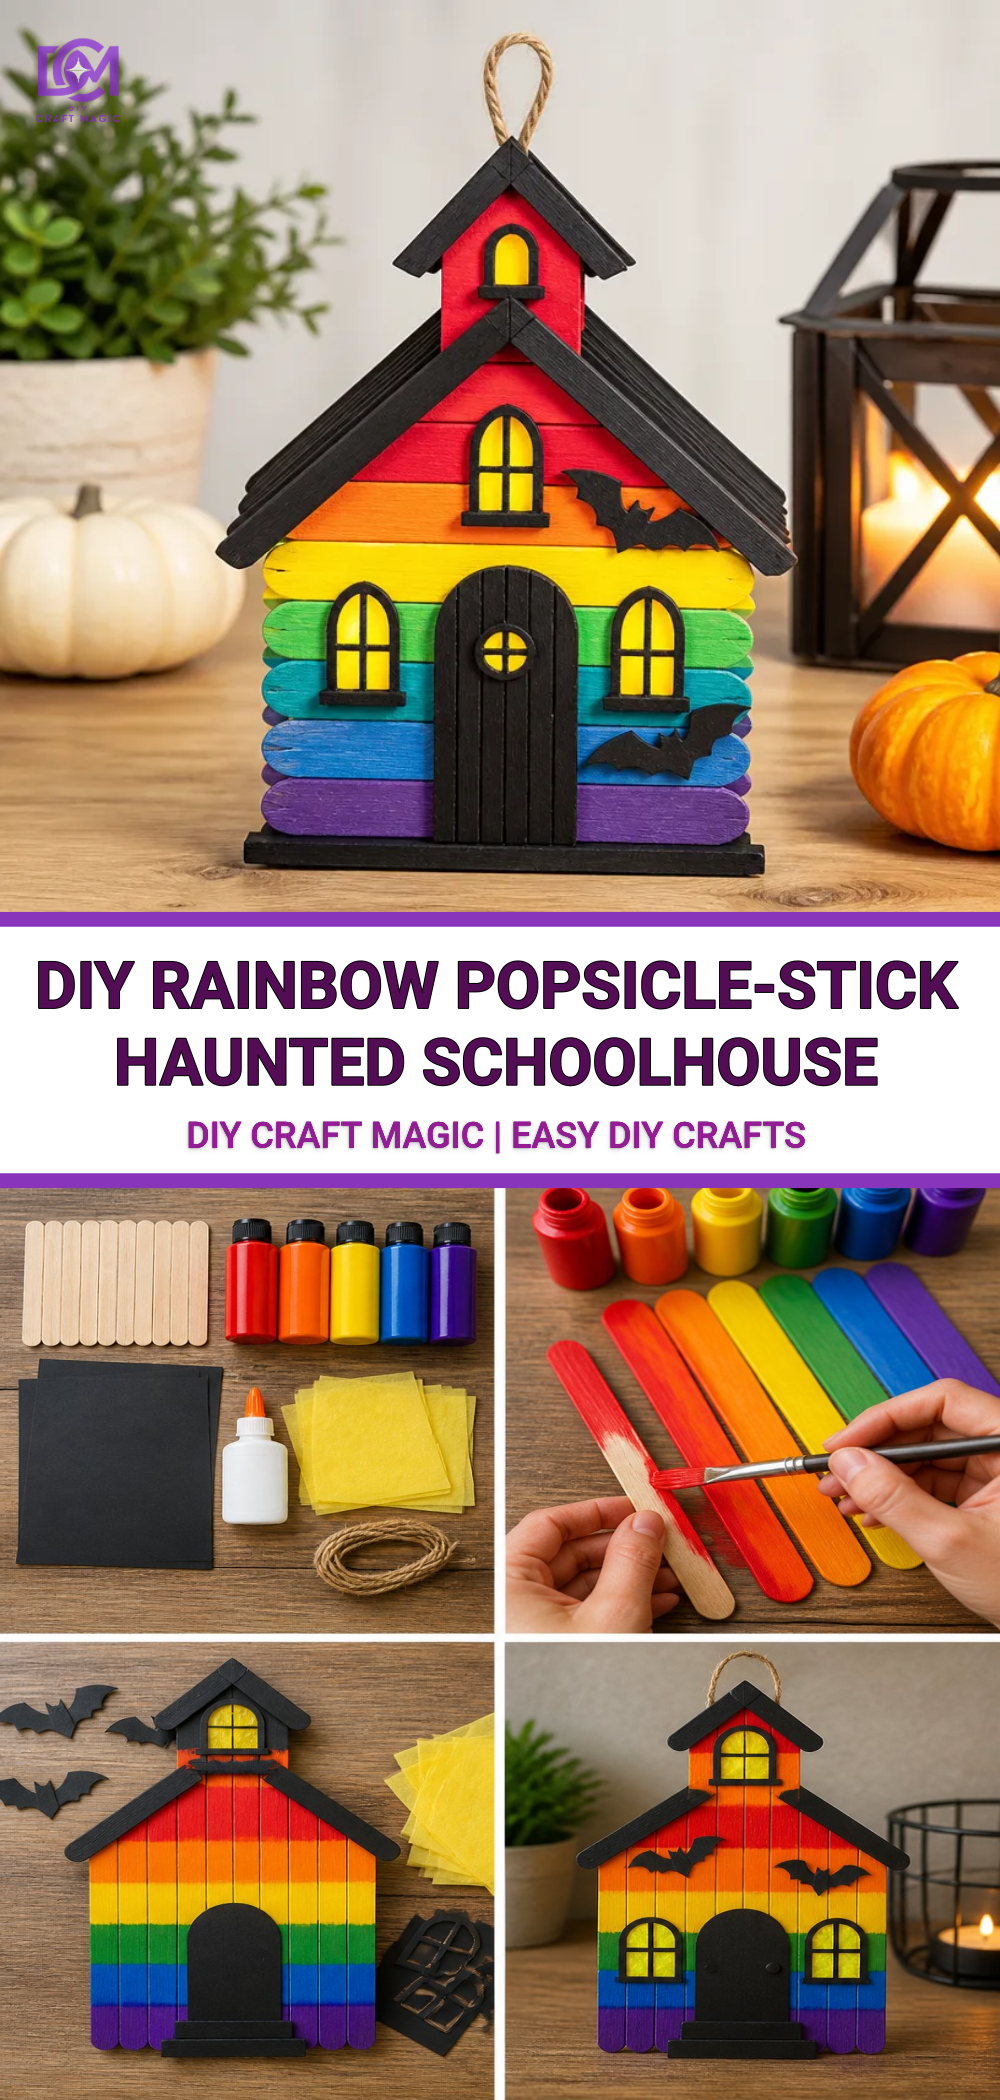
Create the Base: Start by laying out a group of popsicle sticks to form a square as the base of your schoolhouse. Use hot glue to secure them together at the corners. This will give you a sturdy foundation.
Build the Walls: Next, arrange more popsicle sticks vertically to form the walls of the schoolhouse. Depending on your desired height, you may stack the sticks several layers high, securing each layer with hot glue.
Paint the Walls: Once the walls are set, it’s time to paint them. Use your chosen craft paint to color the walls. A great idea is to create a rainbow gradient, which ties into the fun theme. After painting, allow the glue and paint to dry completely.
Add the Roof: For the roof, use triangular pieces made from popsicle sticks to create a peaked top. Glue these in place securely.
Decorate: Cut out windows and doors from black construction paper and glue them onto the schoolhouse. Use small decorative items like googly eyes and mini pumpkins to bring your schoolhouse to life just as you would in the whimsical Coffee Filter Rainbow Roses DIY Tutorial.
Finishing Touches: After assembling and decorating, spray your schoolhouse with a clear adhesive spray or outdoor sealant to protect it if you’ll display it outdoors, enhancing its durability.
Getting the Colors Right
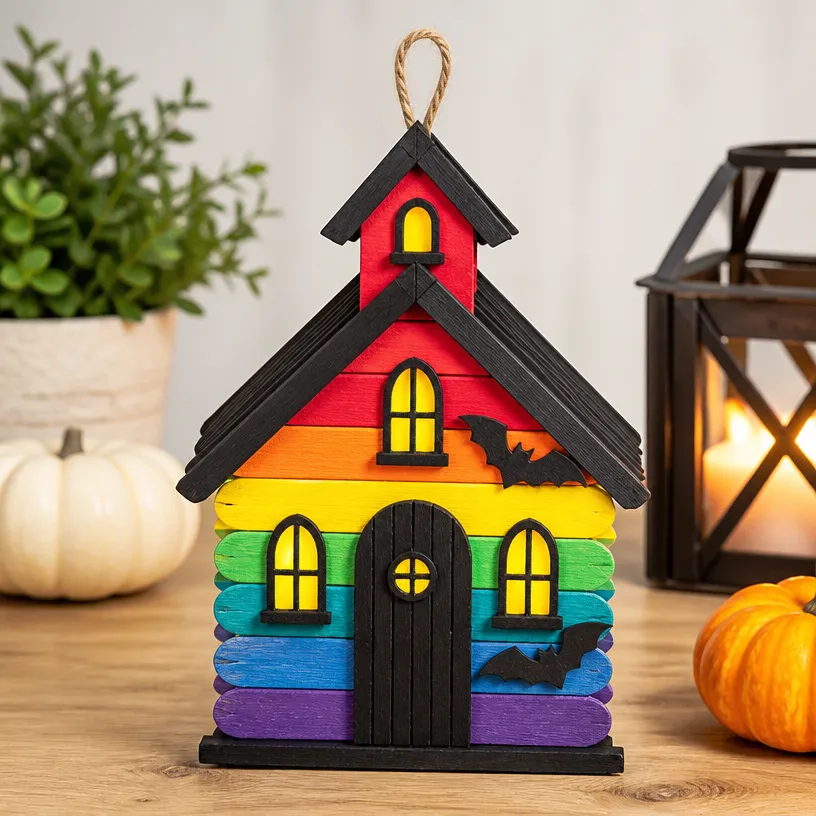
For a stunning finish, consider your palette carefully. Bright colors such as pink, yellow, and blue give a joyous feel, while using darker tones like deep purple can add spookiness to your haunted schoolhouse. Mixing these shades will result in a unique look. You can explore more ideas for colorful crafts with Colorful Rainbow Mug Craft as inspiration.
Helpful Tips
- Use a Variety of Shapes: Don’t hesitate to cut popsicle sticks to various lengths. This will create interesting visual dynamics for your schoolhouse design.
- Involve Kids: This project is perfect for kids of all ages. They can help with painting, gluing, and decorating, making it a fun family activity.
- Safety First: If younger kids are involved, ensure adult supervision, especially when using hot glue or scissors.
Common Mistakes to Avoid
- Lack of Patience: Make sure each layer of glue dries before continuing. Rushing can lead to collapse.
- Overcrowding Decorations: While it’s tempting to add as many decorations as possible, keeping it balanced will enhance the overall look of your schoolhouse.
Crafting With Kids
This project is a wonderful opportunity for parents and children to bond. Allow kids to choose their colors and decorate the schoolhouse with creativity. You can plan a crafting day with various projects, much like those found in DIY Rainbow Popsicle Stick Flower Wheel Craft, to make it even more enjoyable!
Ways to Customize It
You can add seasonal decorations or personalize the haunted schoolhouse with family names or themes. For instance, painting specific characters or symbols on the walls that represent your favorite spooky stories can make it truly unique.
Frequently Asked Questions
How should I store my haunted schoolhouse after Halloween?
Store your project in a cool, dry place, preferably in a box to avoid damage.
Can I use other materials instead of popsicle sticks?
Certainly! Craft sticks or even cereal boxes can work as alternatives.
How can I make this craft enduring?
Using outdoor sealant is key if you plan to display your craft outside. It protects the paint and structure.
Final Thoughts
Creating a DIY Rainbow Popsicle-Stick Haunted Schoolhouse is a fabulous way to celebrate Halloween while expressing creativity. It’s bright, colorful, and a bit spooky, making it a perfect addition to your fall decor. Enjoy crafting, and let your imagination run wild!
Conclusion
For more compelling DIY ideas to brighten up your home, consider exploring the DIY Ombre Sand Jar Craft Tutorial or discover inspiring local activities listed on the Events – Forest Preserves of Cook County page.
Print
DIY Rainbow Popsicle-Stick Haunted Schoolhouse
- Total Time: 1 hour
- Makes: 1 haunted schoolhouse
Description
Create a delightful and spooky addition to your Halloween decor with this colorful DIY rainbow popsicle-stick haunted schoolhouse craft, perfect for the entire family.
Materials
- Popsicle sticks (colorful, as many as you like)
- Craft paint (various colors)
- Hot glue gun and glue sticks
- Scissors
- Black construction paper (for details)
- Small decorative items (e.g., googly eyes, mini pumpkins)
- A paintbrush
- Clear adhesive spray or outdoor sealant (for durability)
Instructions
- Create the Base: Start by laying out a group of popsicle sticks to form a square as the base of your schoolhouse. Use hot glue to secure them together at the corners.
- Build the Walls: Next, arrange more popsicle sticks vertically to form the walls of the schoolhouse, securing each layer with hot glue.
- Paint the Walls: Use craft paint to color the walls, creating a rainbow gradient. Allow the glue and paint to dry completely.
- Add the Roof: Use triangular pieces made from popsicle sticks to create a peaked roof and glue securely.
- Decorate: Cut windows and doors from black construction paper and glue them onto the schoolhouse. Use decorative items to enhance its look.
- Finishing Touches: Spray the assembled schoolhouse with clear adhesive spray or outdoor sealant for durability.
Notes
This project is perfect for kids of all ages with adult supervision. Customize your schoolhouse with seasonal decorations and themes.