


DIY Spooky Glass Bottle Lanterns
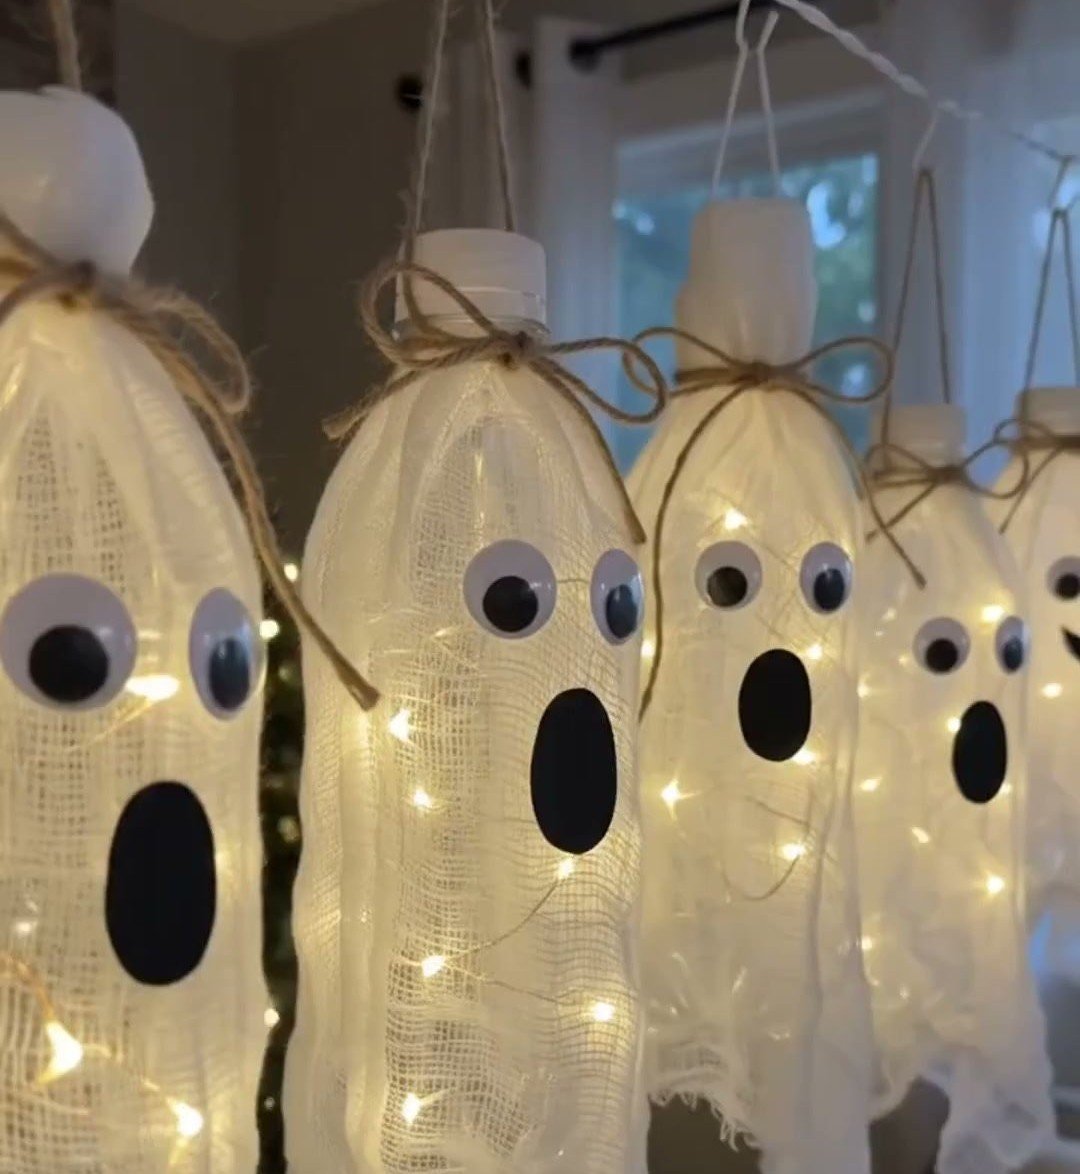
Transform your empty plastic bottles into enchanting spooky glass bottle lanterns that are perfect for Halloween or any festive gathering. This easy project will not only provide a delightful craft experience but also add an ethereal glow to your décor. Using materials you likely already have at home, these lanterns are visually striking and sure to impress both kids and adults alike. The dual nature of this craft a fun hands-on project followed by a beautiful reveal makes it particularly satisfying. You may also find Clear Blue Rainbow Bat Suncatcher Wreath Diy useful.

You may also find Diy Rainbow Popsicle Stick Flower Wheel Craft useful.
Materials You’ll Need
- Empty plastic bottles (a variety of sizes)
- White paint or white tape
- Black marker or black paper
- Tea lights or LED candles
- String or materials for hanging (optional)
How to Make DIY Spooky Glass Bottle Lanterns
This project can be broken down into a few straightforward steps that are easy to follow. Here’s how you can make your own spooky lanterns:
Clean the Bottles: Start by cleaning the outside of the plastic bottles, removing any labels and residues. Allow them to dry completely to ensure proper paint adhesion.
Prepare the Base: Paint the bottles with white paint or wrap them in white tape. If you opt for paint, let it dry thoroughly before moving on to the next step.
Add Fabric Accents: Drape white fabric or tissue paper over the top of each bottle and secure it at the neck with twine. This could also create an appealing texture for your lanterns.
Create Spooky Faces: Use a black marker to draw spooky ghost faces on your bottles or cut out shapes from black paper and attach them. Feel free to let your imagination run wild with different expressions!
Insert the Lighting: Place an LED tea light or candle into the bottom of each bottle, ensuring it stands securely. This will create a warm, inviting glow once lit.
Display Your Lanterns: If desired, use string to hang your lanterns or arrange them on a table as centerpieces, just like other delightful crafts showcased on our site, such as the cupcake liner dahlia bouquet.
Helpful Tips
Choosing Bottles: Consider using various sizes of bottles to create a visually appealing display. Larger bottles can provide a more substantial lantern, while smaller ones can add variety.
Safety First: If using real candles, always supervise them when lit and ensure they are on a stable, non-flammable surface.
Customization: You can personalize the designs on your lanterns by using different colors of paper or paint, allowing creativity to flow. Consider adding some sparkle with glitter or additional cut-out details.
Common Mistakes to Avoid
Improper Cleaning: Ensure that your bottles are cleaned thoroughly. Residues can cause the paint to peel or not adhere properly, affecting the overall look of your lanterns.
Rushing the Drying Process: Take your time to let the paint dry before adding any decorations. This will prevent smudges or paint transfers.
Flammable Decorations: Be cautious with decorative materials. Avoid using anything highly flammable near the light source, especially if you decide to use real candles.
Frequently Asked Questions
Can I use different colors besides white?
Absolutely! While the classic spooky look is achieved with white, you can use any color that you prefer. Get creative and use colors that fit your theme!
What type of lighting works best?
LED tea lights are the safest option, especially if you have children around, as they eliminate the risk of fire. However, if real candles are used, ensure they are supervised at all times.
How long does the project take?
Depending on your painting and drying times, you can complete this project in about 1-2 hours, allowing for paint to dry fully.Creating these DIY Spooky Glass Bottle Lanterns is a fantastic way to engage in a fun craft while getting ready for the autumn festivities. Your kids will love helping you, making it an ideal family activity. Gather your materials and let the crafting begin!
Conclusion
Once you’ve crafted your spooky lanterns, you may want to explore additional Halloween-themed projects. For more ideas, check out Upcycled Halloween Lanterns – 10 Minute Crafts, where you’ll find quick and creative decorations to enhance your festive spirit. Enjoy your crafting!
Print
DIY Spooky Glass Bottle Lanterns
- Total Time: 120 minutes
- Makes: 5 lanterns
Description
Transform your empty plastic bottles into enchanting spooky glass bottle lanterns, perfect for Halloween or any festive gathering.
Materials
- Empty plastic bottles (variety of sizes)
- White paint or white tape
- Black marker or black paper
- Tea lights or LED candles
- String or materials for hanging (optional)
Instructions
- Clean the bottles by removing labels and residues, then let them dry completely.
- Prepare the base by painting the bottles with white paint or wrapping them in white tape, allowing them to dry.
- Add white fabric or tissue paper over the top of each bottle and secure at the neck with twine.
- Create spooky faces using a black marker or black paper shapes.
- Insert an LED tea light or a candle into the bottom of each bottle.
- Display your lanterns using string to hang or arrange them on a table.
Notes
Consider using various bottle sizes for visual appeal. Always supervise real candles.