


Rainbow Fingerprint Ice Cream Canvas Artwork
Creating a colorful Rainbow Fingerprint Ice Cream Canvas Artwork is a delightful way to combine art and personal expression! This project lets you turn simple fingerprints into a vibrant ice cream masterpiece that’s perfect for displaying in your home or giving as a gift. The delightful blend of colors and playful designs make this craft approachable and satisfying for children and adults alike. You may also find Colorful Rainbow Feather Window Decor Artwork useful.
Before You Start
Before diving into this colorful art project, gather all your materials to make the process smooth and enjoyable. Here’s what you will need:
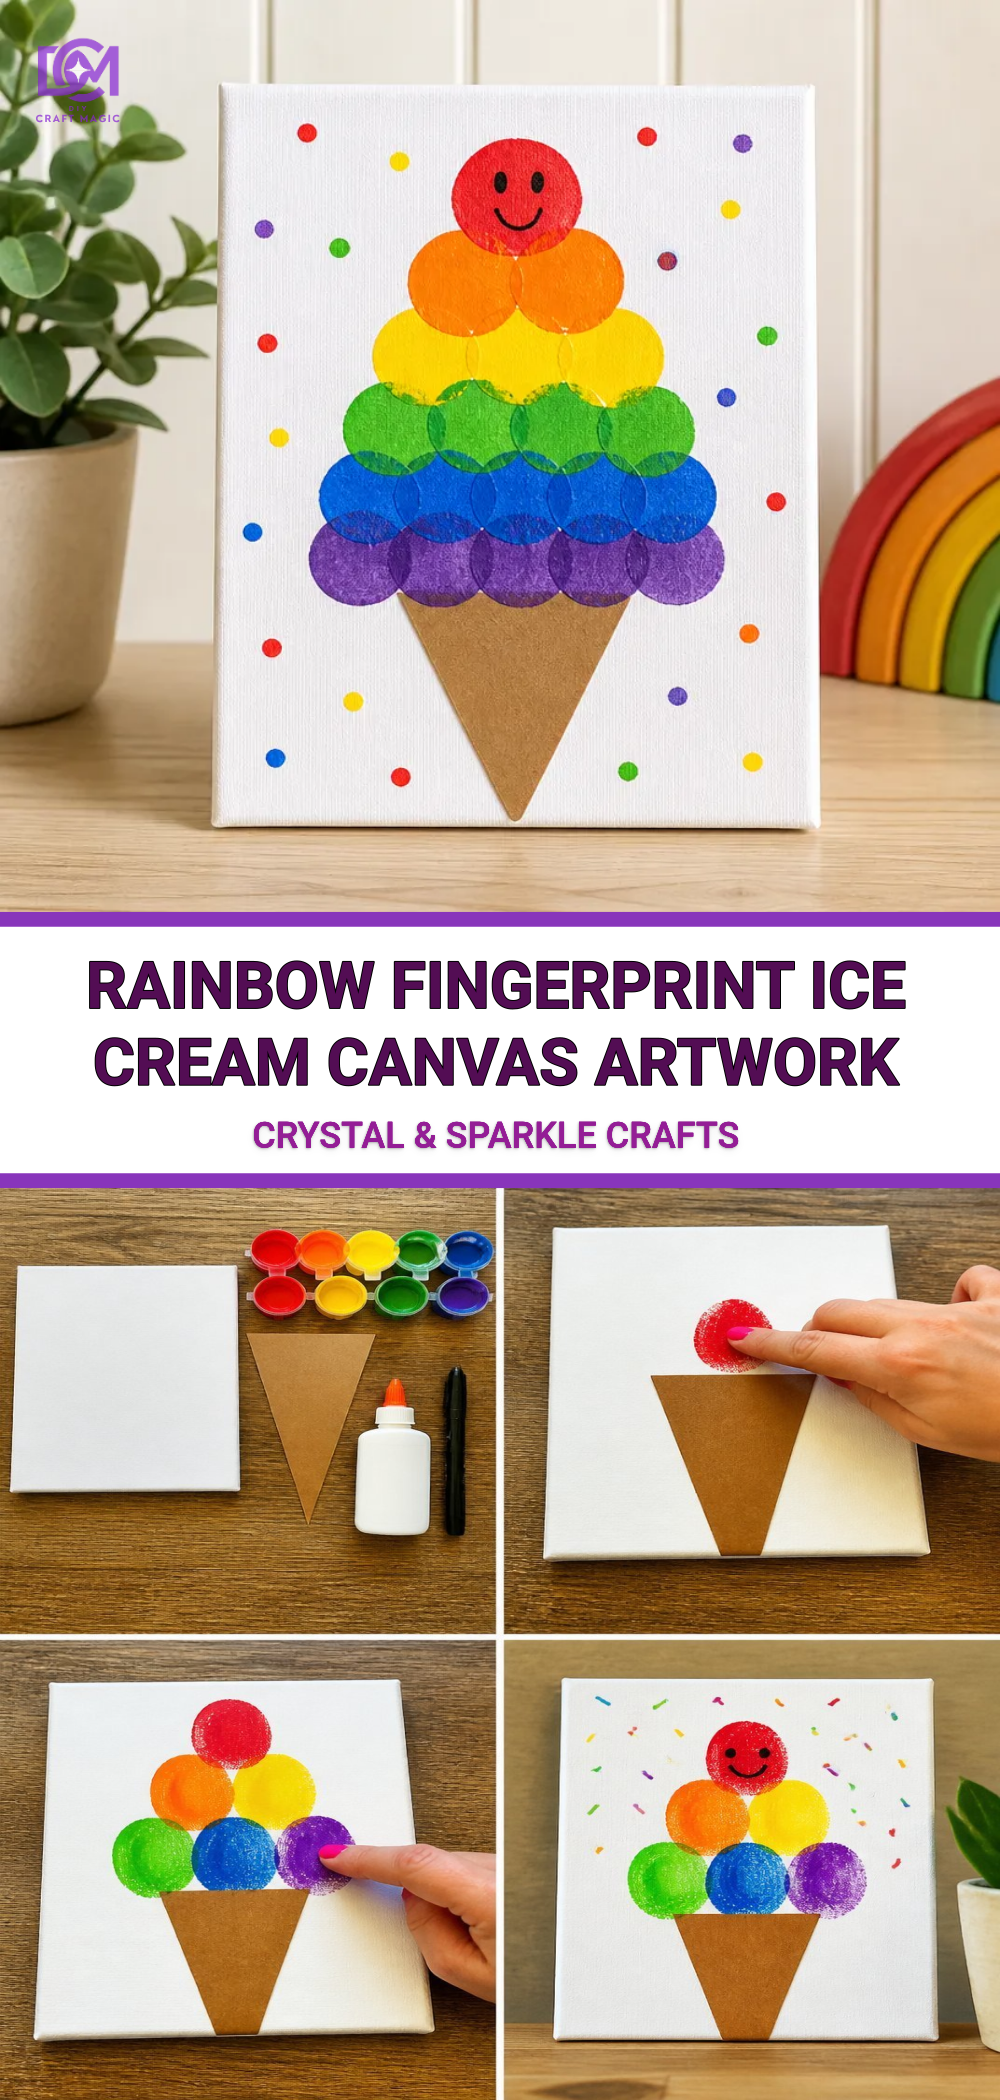
Materials You’ll Need
- Canvas (any size you prefer)
- Non-toxic paint in a variety of colors (suggested colors: pink, purple, blue, yellow, green)
- Fingerprint ink pad or washable ink
- Paintbrushes
- Water for cleaning brushes
- A pencil
- Optional: Glitter or embellishments for added sparkle
Choosing Your Materials
Selecting the right colors and tools is essential for creating vibrant artwork. Non-toxic paints are a safe choice, especially if kids are involved. If you want to explore other colorful projects, consider making rainbow bubble art on canvas which uses a fun and messy technique similar to this one!
How to Make Rainbow Fingerprint Ice Cream Canvas Artwork
Now, let’s get started with the fun part creating your art!
Step-by-Step Instructions
Prepare the Canvas: Start by using a pencil to sketch the outline of an ice cream cone on your canvas. This will serve as a guide for where you will place your fingerprints.
Choose Your Colors: Select your paint colors, inspired by the rainbow. Combine them in bowls if you’re mixing colors.
Fingerprinting: Use your finger to dab into the chosen paint and make a fingerprint above the cone sketch, creating the “scoops” of ice cream. Feel free to overlap colors for a more layered look. If you need more color ideas, take a look at these colorful canvas wall art tips.
Let It Dry: Allow the fingerprints to dry completely before proceeding. This usually takes about 30 minutes depending on the paint thickness.
Add Details: Once fully dry, you can use a brush to paint the cone and other details like sprinkles, cherries, or decorative elements around the ice cream.
Creating the Crystal Effect
For an extra touch of sparkle, consider using glitter or applying a glossy topcoat once your painting is dry. This will enhance colors and give your artwork a beautiful sheen.
Getting the Colors Right
Experimenting with color combinations is key to achieving a vibrant artwork. Try to mix shades and create gradients with your fingerprints. If you’re looking for inspiration, check out alternative colorful crafts for creative ideas.
Helpful Tips
- Practice First: If you’re nervous about fingerprinting, practice on a piece of paper before making marks on your canvas.
- Use Different Fingers: For different sizes and shapes of scoops, try using different fingers or even thumbs to apply the paint.
Common Mistakes to Avoid
- Too Much Paint: Make sure to use a light amount of paint on your finger. Excess paint can create a blob rather than a fingerprint.
- Rushing Through Drying: It can be tempting to rush, but letting each layer dry is crucial for creating a clean result.
Ways to Customize It
Consider personalizing the ice cream canvas further! You can add names or special messages. A fun variation could include creating a rainbow ice gem art project, which utilizes colorful resin for a different but equally vibrant effect.
Display Ideas
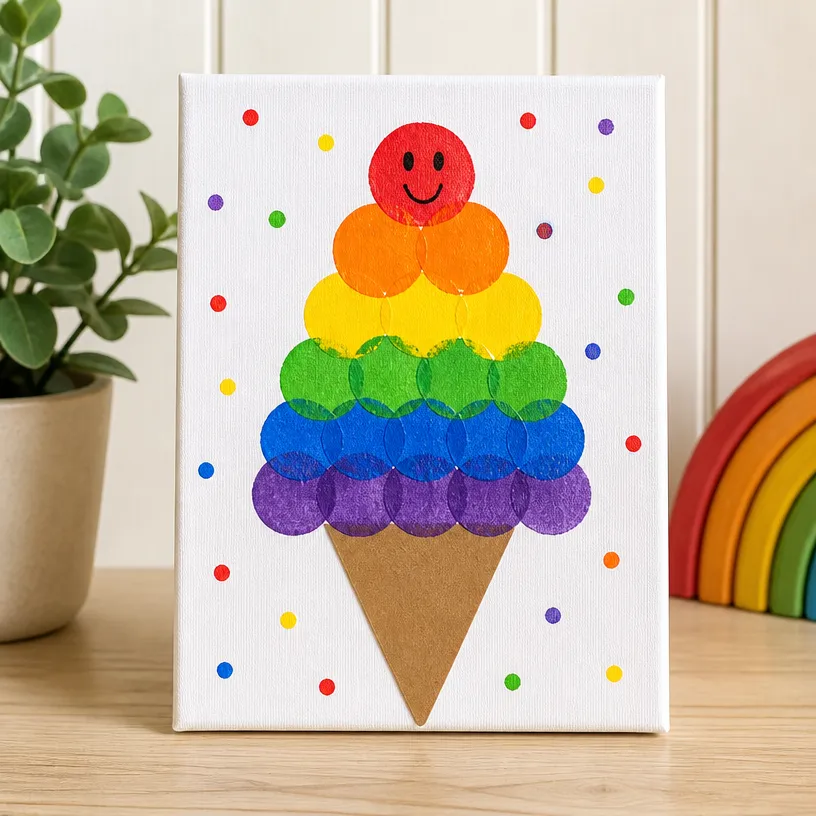
Once completed, hang your Rainbow Fingerprint Ice Cream Canvas Artwork in a child’s room, a playroom, or maybe even the kitchen for a splash of personality. It can also make a heartfelt gift for loved ones on special occasions!
Frequently Asked Questions
What types of paint work best for this project?
Non-toxic acrylic paints are ideal as they provide vibrant colors and are easy to clean.
How long should I let the canvas dry?
Allow each layer of paint to dry for at least 30 minutes to avoid smudging.
Can I use different types of canvases?
Absolutely! Any canvas will work, but stretched canvas works best for painting.
Conclusion
The Rainbow Fingerprint Ice Cream Canvas Artwork is a wonderful project to indulge in creativity and craftsmanship. If you’re looking for more unique art ideas, you might like this editable ice cream fingerprint art, or maybe a delightful Valentine’s project from The Farmwife Crafts. Enjoy crafting this vibrant masterpiece with your family and make lasting memories!
Print
Rainbow Fingerprint Ice Cream Canvas Artwork
- Total Time: 45 minutes
- Makes: 1 canvas artwork
Description
A delightful project combining art and personal expression using fingerprints to create a vibrant ice cream masterpiece.
Materials
- Canvas (any size)
- Non-toxic paint (colors: pink, purple, blue, yellow, green)
- Fingerprint ink pad or washable ink
- Paintbrushes
- Water for cleaning brushes
- A pencil
- Optional: Glitter or embellishments
Instructions
- Prepare the canvas by sketching an outline of an ice cream cone.
- Choose your paint colors and mix them in bowls.
- Use your finger to apply paint and create fingerprints above the cone sketch.
- Allow the fingerprints to dry completely (about 30 minutes).
- Add details like the cone, sprinkles, or other decorative elements.
- Consider using glitter or a glossy topcoat for extra sparkle.
Notes
Feel free to experiment with color combinations and try using different fingers for varied scoop sizes.