

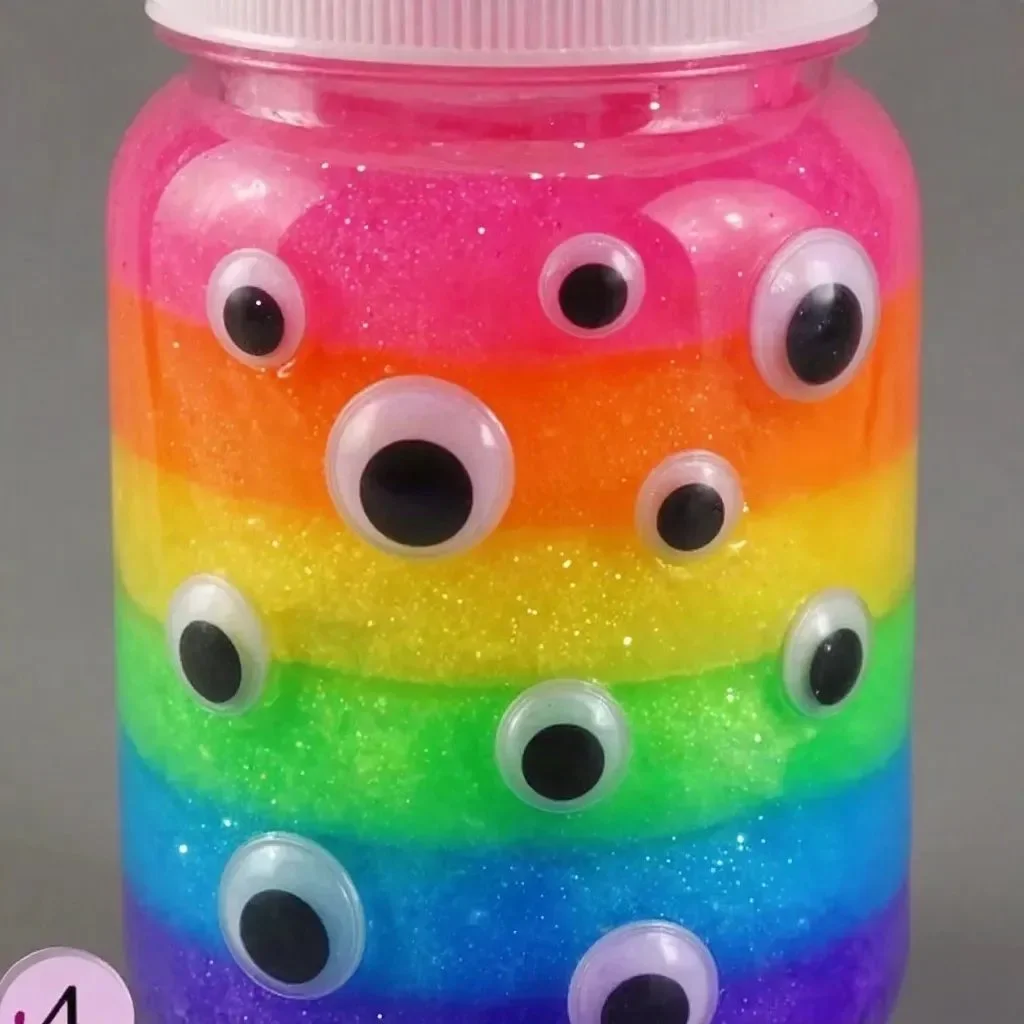
Rainbow Glowing Monster Slime
Get ready to craft an exciting and visually stunning project with your children: Rainbow Glowing Monster Slime! This fun activity will engage kids of all ages, as they create a bright, colorful slime that glows enchantingly in the dark. The slime’s glossy texture and vibrant hues make it not only fun to make but also satisfying to play with afterward. If you are looking for a project that combines creativity and sensory exploration, this is a perfect choice! You may also find Clear Blue Rainbow Bat Suncatcher Wreath Diy useful.
Why You’ll Love This Project
Creating your own glowing slime is a fantastic way to explore colors and textures while having loads of fun. The combination of white school glue, water, and various hues of food coloring will produce multiple shades of slime, making it a colorful and eye-catching end product. Plus, the addition of glow-in-the-dark paint or powder adds a magical twist, ensuring that your slime will light up the room when the lights go out. If your kids enjoy crafting and want to create something unique, they will love this easy DIY experience.
Before we dive into making your rainbow slime, let’s take a look at the materials you’ll need to bring this project to life.

Materials You’ll Need
To create your Rainbow Glowing Monster Slime, gather the following materials:
- 1 cup white school glue
- 1 cup water
- 1 teaspoon baking soda
- 1 tablespoon contact lens solution
- Glow-in-the-dark paint or powder
- Food coloring (various colors)
- Glitter (optional)
With these materials in hand, you’re all set for a fun crafting session!
How to Make Rainbow Glowing Monster Slime
Follow these easy steps to create slime that’s not only engaging but also exciting to watch as it glows.
Mix Glue and Water
In a mixing bowl, combine the white school glue with water and stir until smooth. This forms the base of your slime, creating a clear and glossy texture that will hold your colors beautifully.Add Baking Soda
Next, add the baking soda to the glue mixture and stir until it’s completely dissolved. This is an essential step as it helps to solidify the slime and gives it that stretchy consistency.Include Glow-in-the-Dark Paint
Carefully mix in your glow-in-the-dark paint or powder. Make sure to blend it thoroughly so that the glow is evenly distributed throughout the slime mixture.Divide and Color
Now, divide the mixture into several bowls. This is where the fun begins! Add different food coloring to each bowl to create a variety of vibrant colors. Stir well until you achieve your desired shades.
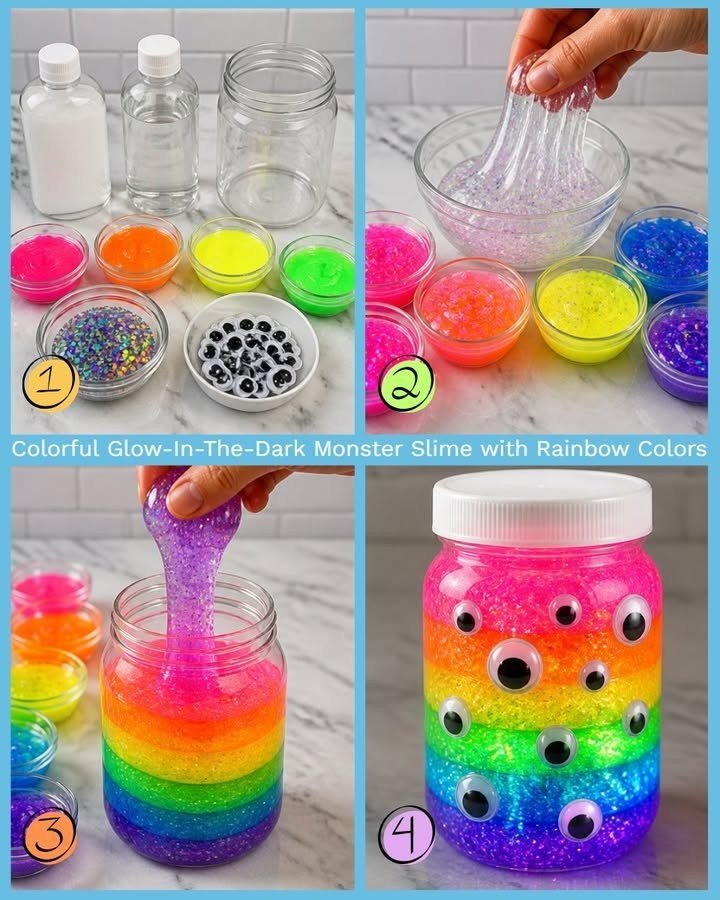
Combine with Contact Lens Solution
Slowly pour in the contact lens solution while stirring continuously. The slime will begin to clump together. This reaction is crucial to achieving that perfect slime texture, so ensure you incorporate the solution gradually.Knead Your Slime
Once the mixture is mostly clumped, take it out of the bowl and knead it with your hands. You may need to knead for a few minutes until it reaches your preferred consistency. If it remains sticky, you can add a bit more contact lens solution.Add Glitter
If you want to add an extra touch of sparkle, now is the time to mix in optional glitter. This can make your slime look even more magical, especially under a black light!Store Properly
Finally, after enjoying your creation, store your slimy masterpieces in airtight containers to keep them fresh for future play sessions.
Helpful Tips
- Safety First: Always supervise young children while making slime, especially when handling contact lens solutions or baking soda.
- Experiment with Colors: Don’t be afraid to mix colors! You can create unique shades and combinations, and you might discover a new favorite.
- Make It Seasonal: Consider adding themes to your slime! For Halloween, why not try a spooky green? Or for a holiday, you could create red and green slime!
For more exciting crafting ideas, try additional projects like creating Rainbow Cupcake Liner Monster Wreath or even make Rainbow Monster Pencil Holders that can be used to store your crafty tools!
Troubleshooting Common Issues
If your slime turns out too runny, try adding a little more contact lens solution and knead it thoroughly until it thickens. Conversely, if it’s too stiff, a tad more water can help restore its desired consistency.
Frequently Asked Questions
Can I use different types of glue?
While white school glue works best, you can experiment with clear glue for a translucent effect. Just note that results may vary.
What can I do if the slime doesn’t glow?
Ensure that you are using high-quality glow-in-the-dark paint or powder, and remember to expose it to light for a sufficient period to charge the glow.Keep exploring your creativity, and you might even discover new variations to this project, like incorporating different textures or scents. This project not only fosters creativity but also serves as a fun sensory experience for children.
Conclusion
Rainbow Glowing Monster Slime is not just a craft project; it’s an enjoyable and engaging experience that sparks creativity and encourages children to explore colors and textures. If you’re looking for an additional sensory play option, consider the Ocean Glow in The Dark Slime Kit, which offers even more slime-based fun!
Print
Rainbow Glowing Monster Slime
- Total Time: 10 minutes
- Makes: 4 servings
Description
Create your own vibrant, glowing slime with this fun DIY project that’s perfect for kids of all ages.
Materials
- 1 cup white school glue
- 1 cup water
- 1 teaspoon baking soda
- 1 tablespoon contact lens solution
- Glow-in-the-dark paint or powder
- Food coloring (various colors)
- Glitter (optional)
Instructions
- Mix glue and water in a bowl until smooth.
- Add baking soda and stir until dissolved.
- Include glow-in-the-dark paint or powder, mixing until blended.
- Divide the mixture into bowls and add food coloring.
- Combine with contact lens solution while stirring continuously.
- Knead the slime until you reach your preferred consistency.
- Add optional glitter for extra sparkle.
- Store in airtight containers for freshness.
Notes
Always supervise young children during the process. Experiment with colors and enjoy seasonal themes for your slime!