


DIY Rainbow Twig Bead Suncatcher
Create a stunning DIY Rainbow Twig Bead Suncatcher that catches sunlight and transforms it into a beautiful display of colors. This project is approachable, fun, and uses everyday materials to craft a gorgeous piece that will brighten your window. The colorful beads and twigs create an enchanting effect that adds a playful touch to any space. You may also find Beaded Heart Suncatcher Diy Project useful.

You may also find Clear Blue Rainbow Bat Suncatcher Wreath Diy useful.
Materials You’ll Need
To get started, gather these materials: You may also find Melted Bead Butterfly Suncatcher Diy Tutorial useful.
- Clear plastic lids or a round baking pan
- Rainbow colored beads (translucent works best)
- Twigs (thin and sturdy)
- Hot glue gun and glue sticks
- Fishing line or string for hanging
- Scissors
Why You’ll Love This Project
One of the best aspects of this DIY Rainbow Twig Bead Suncatcher is its simplicity. You don’t need any advanced crafting skills to achieve stunning results. Each suncatcher reflects light beautifully, creating rainbows across your walls and floors. Plus, it’s an excellent way to engage with your kids or explore your creative side.
Choosing Your Materials
Choosing the right materials is key. Opt for brightly colored beads, preferably transparent or translucent, as they will allow light to shine through. Twigs can often be found in your backyard, adding a natural element to your craft. For a unique twist, consider using materials from other projects, like those in melted bead crafts.
How to Make DIY Rainbow Twig Bead Suncatcher
Step 1: Prepare Your Base
Start by deciding the size of your suncatcher. If using a round pan, choose one that matches your desired size. Clear lids offer a great alternative as they provide a beautiful frame for your design.
Step 2: Design Your Layout
Before gluing anything down, arrange your beads and twigs on the base. Create a color gradient with the beads, mixing different colors to achieve a rainbow effect. Remember, this is your chance to get creative!
Step 3: Secure the Beads
Once you are happy with your layout, it’s time to glue everything in place. Attach each bead firmly using hot glue, ensuring they adhere well to the base. Be cautious when using the hot glue gun, and consider having adult supervision when doing this step with kids.
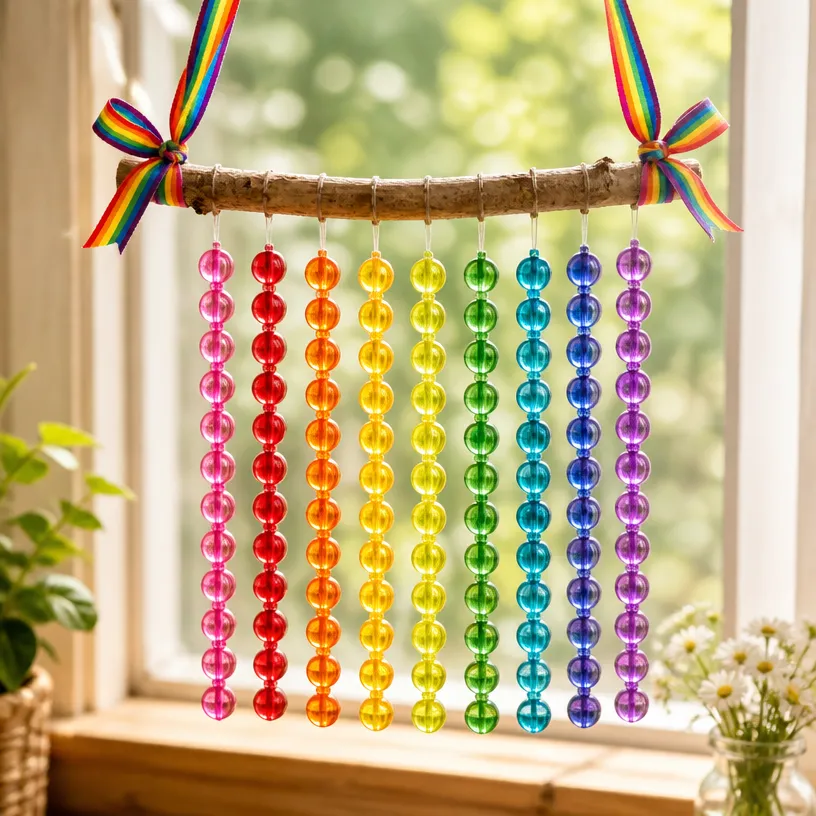
Step 4: Attach the Twigs
Now, using the same hot glue, secure the twigs around your bead design. Play with angles and placement to create visual interest. The twigs will serve as the structure for your suncatcher, so make sure they are firmly in place.
Step 5: Create the Hanging Mechanism
Finally, take the fishing line and cut a piece long enough to hang your suncatcher from a window. Attach the fishing line to the top of the suncatcher using hot glue, making sure it’s secure. Test the strength of the bond before fully relying on it for hanging.
Helpful Tips
- When choosing twigs, look for thinner branches that can easily bend but still remain sturdy enough to hold the weight of the beads.
- Adding a few larger beads can introduce a new dimension to your piece.
Common Mistakes to Avoid
Ensure your beads are securely glued before moving your project. If they aren’t attached well, they may fall off when you hang the suncatcher. If possible, try to hang your finished suncatcher immediately; the sunlight will bring it to life!
Customization Ideas
Once you master the basic design, consider experimenting with various color schemes or even themes based on seasons or events. For instance, you could create a more autumnal look with orange and yellow hues. For other fun suncatcher ideas, check out melted crayon ideas to further your crafting escapade.
Crafting With Kids
This craft is perfect for a family activity. Younger kids can help sort the beads by color while older ones can design their own suncatchers. Encourage them to express their creativity and perhaps create a fun competition to see who can design the most original piece.
Display Ideas
Hang your DIY Rainbow Twig Bead Suncatcher in a window where it can catch direct sunlight, or consider hanging it in a doorway. The shimmering colors will create a dazzling effect, enhancing any room’s ambiance.

Frequently Asked Questions
How long will it take for the glue to dry?
The drying time can vary, but generally, allowing the glue at least 30 minutes to cool and harden should suffice before hanging it up.
Can I use different types of beads?
Absolutely! Feel free to mix different types and sizes of beads. Just keep in mind that lighter beads will work best for the overall structure.
What if I don’t have fishing line?
You can substitute fishing line with any string or ribbon, but ensure it’s sturdy enough to support the weight of the suncatcher.
Conclusion
Creating a DIY Rainbow Twig Bead Suncatcher is a delightful way to add color and charm to your home. For more inspiration, explore easy rainbow suncatcher craft ideas or check out a variety of rainbow activities for kids that will inspire even more creativity. Enjoy making beautiful crafts that bring joy and brightness into your life!
Print
DIY Rainbow Twig Bead Suncatcher
- Total Time: 15 minutes
- Makes: 1 suncatcher
Description
Create a stunning DIY Rainbow Twig Bead Suncatcher that catches sunlight and transforms it into a beautiful display of colors, using everyday materials.
Materials
- Clear plastic lids or a round baking pan
- Rainbow colored beads (translucent works best)
- Twigs (thin and sturdy)
- Hot glue gun and glue sticks
- Fishing line or string for hanging
- Scissors
Instructions
- Prepare your base by choosing the size for your suncatcher using clear lids or a round pan.
- Design your layout by arranging beads and twigs in a rainbow gradient.
- Secure the beads by gluing them firmly onto the base with hot glue.
- Attach the twigs around your bead design using the hot glue for stability.
- Create the hanging mechanism with fishing line, ensuring it’s secure before hanging.
Notes
Choosing transparent beads will help maximize light reflection. Thin twigs from your backyard can add a natural touch.