


Recycled Bottle Window Art
Transform your ordinary clear plastic bottles into vibrant window art that catches the eye and brightens any space. This fun and easy craft project is perfect for families, teachers, and creative beginners looking for a hands-on activity that results in beautiful, colorful decor. Imagine how delightful it will be to watch the sunlight filter through your artistic creations, casting colorful reflections and shadows in your home. You may also find Rainbow Butterfly Stakes Recycled Bottles useful.
This project requires only a few approachable materials, including clear plastic bottles and permanent markers, making it a perfect choice for an engaging afternoon with kids or an individual creative session. You may also find Rainbow Flower Garden Stakes Recycled Bottles useful.
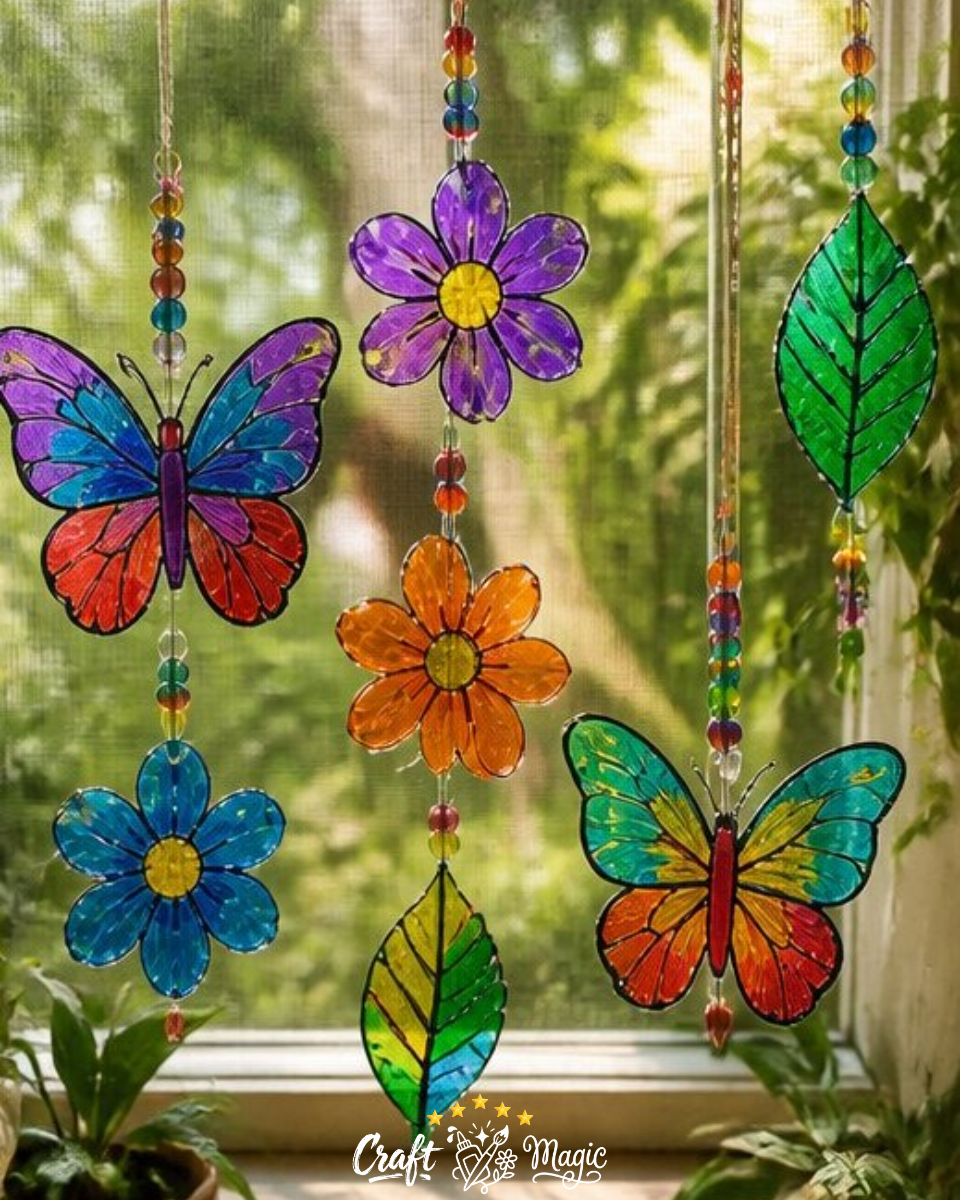
You may also find Rainbow Panda Pencil Cup Recycled Bottle useful.
Materials You’ll Need
Before you begin, gather all the materials required for this project:
- Clear plastic bottles
- Permanent markers
- Scissors
- Hole punch
- String or fishing line
- Optional beads
Make sure to clean and dry your plastic bottles thoroughly before starting the craft. This will ensure that your colors come out bright and true.
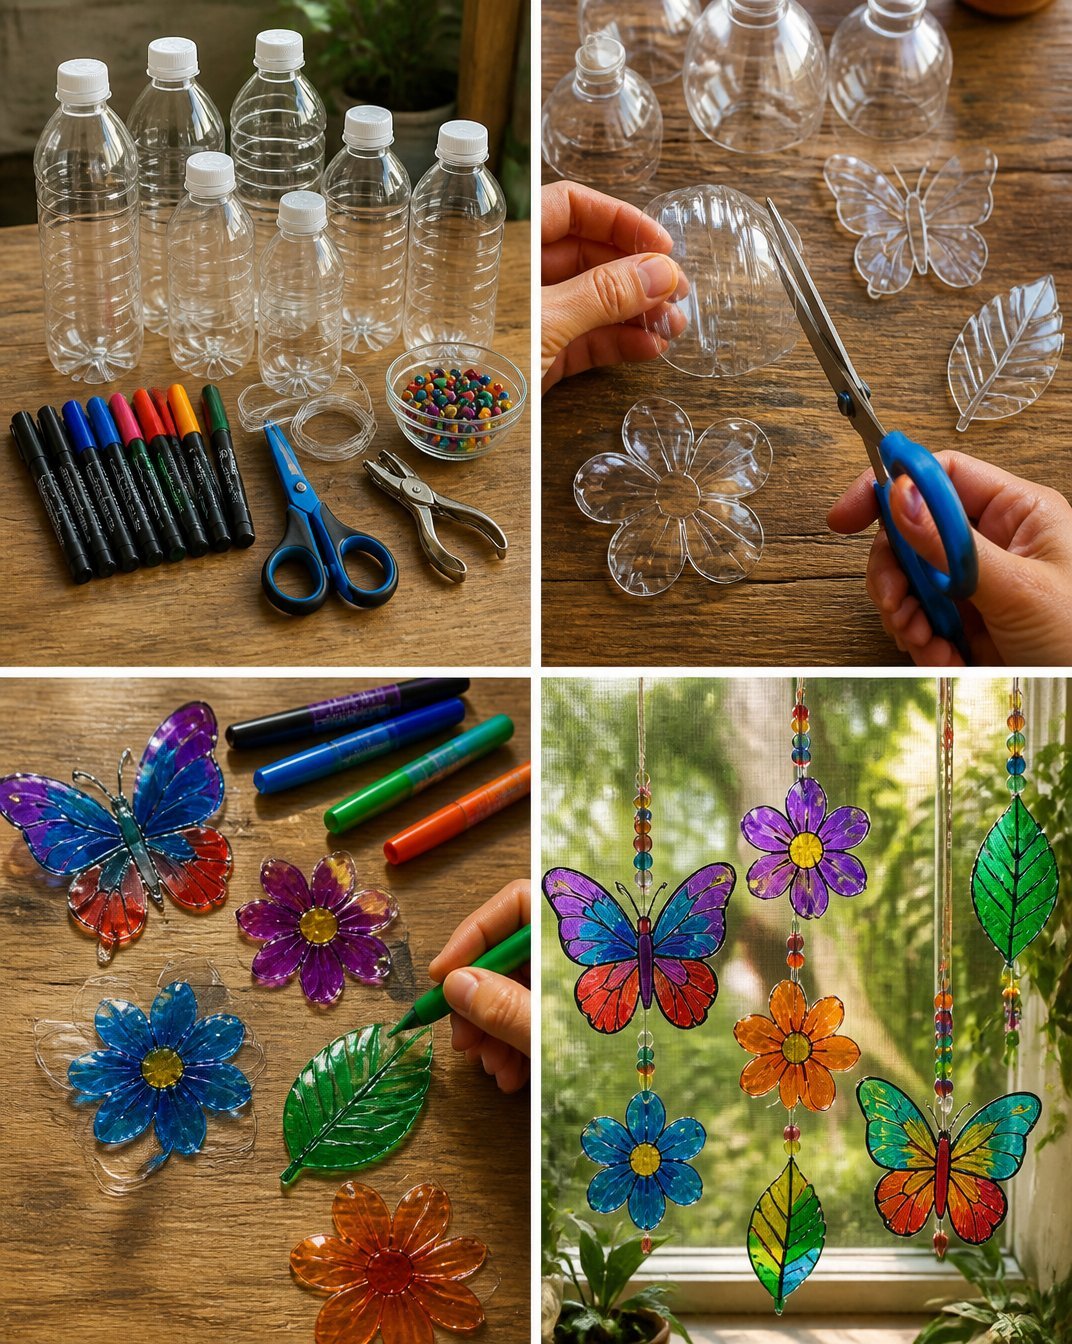
Step-by-Step Instructions
Here’s how to create your recycled bottle window art in just a few simple steps:
Prep the Bottles: Start by washing your plastic bottles, ensuring they are completely dry before proceeding. The cleaner your bottle is, the better your art will adhere.
Cut the Shapes: Carefully cut flat panels or fun shapes from the bottles. You can use cookie cutters or just your imagination to create different designs that can hang in your window.
Add Color: Joyfully color these pieces with the permanent markers. This is where you can let your creativity shine use vibrant colors and let your artwork reflect your personality.
Punch a Hole: Once your pieces are colored and dried, punch a hole at the top of each piece. If you’d like to add a touch of sparkle, now’s a great time to thread in some beads.
Hang Your Art: Finally, use the string or fishing line to hang your colorful creations in a bright window where they can catch the sunlight. Adjust the lengths to create different levels and add a dynamic element to the display.
Helpful Tips
- Getting the Colors Right: For an even more vibrant display, layer different colors on top of each other. The translucent nature of the plastic combined with the markers can create a lovely depth.
- Creating the Crystal Effect: If you’re feeling adventurous, consider adding some lighter, iridescent colors for a crystal-like effect that sparkles in the sunlight.
- Display Ideas: You can hang your artwork at varying heights to create a mobile effect, or cluster several pieces together for a more cohesive look.
Common Mistakes to Avoid
When crafting your window art, keep these common pitfalls in mind:
- Skipping the Cleaning Step: Always make sure your bottles are clean and dry. Any residue can interfere with how the markers adhere to the plastic.
- Overloading with Color: While layers can add depth, be cautious not to overdo it. Too many colors can muddy the final look.
- Using the Wrong Adhesives or Materials: Stick to permanent markers for coloring; other inks may run or fade when exposed to sunlight.
Ways to Customize It
Get creative with your window art by changing aspects of the project:
- Seasonal Decorations: Make different designs for seasonal occasions flowers for spring, snowflakes for winter, or even holiday-themed motifs.
- Size Variations: Use different sized bottles to create artwork that ranges from small charms to large panel designs.
- Theme Ideas: Consider creating a themed collection, such as a series of animals or shapes, that can complement each other visually.
Frequently Asked Questions
Can I use regular markers instead of permanent ones?
Regular markers may not provide the same durability, especially when exposed to sunlight, and the colors might fade over time. It’s best to stick with permanent markers for lasting results.
How do I hang my window art without damaging my window?
Using string or fishing line is ideal as it is lightweight and won’t damage the window. You can tie small knots to keep the artwork secure without needing any adhesives.
What if I make a mistake while coloring?
No worries! You can wipe away any mistakes with a paper towel while the ink is still wet. If the ink dries, you might be able to scrape it off gently.
Conclusion
This recycled bottle window art project not only helps reduce waste but also adds a splash of color to your home. To see more artistic inspirations and creative projects, you might explore resources like Plastic Bottle Cap Art – City Gas Company window – Antigo Visual Arts. Whether you’re decorating for a special occasion or just want to brighten your space, this craft is sure to bring joy and creativity into your life. Enjoy your crafting!
Print
Recycled Bottle Window Art
- Total Time: 15 minutes
- Makes: Varies based on number of bottles used
Description
Transform ordinary clear plastic bottles into vibrant window art that brightens any space. Perfect for families and creative beginners.
Materials
- Clear plastic bottles
- Permanant markers
- Scissors
- Hole punch
- String or fishing line
- Optional beads
Instructions
- Prep the bottles: Start by washing your plastic bottles, ensuring they are completely dry before proceeding.
- Cut the shapes: Carefully cut flat panels or fun shapes from the bottles.
- Add color: Color these pieces with the permanent markers.
- Punch a hole: Once your pieces are colored and dried, punch a hole at the top of each piece.
- Hang your art: Use the string or fishing line to hang your colorful creations in a bright window.
Notes
For vibrant displays, layer different colors and consider adding iridescent colors for a sparkling effect.