

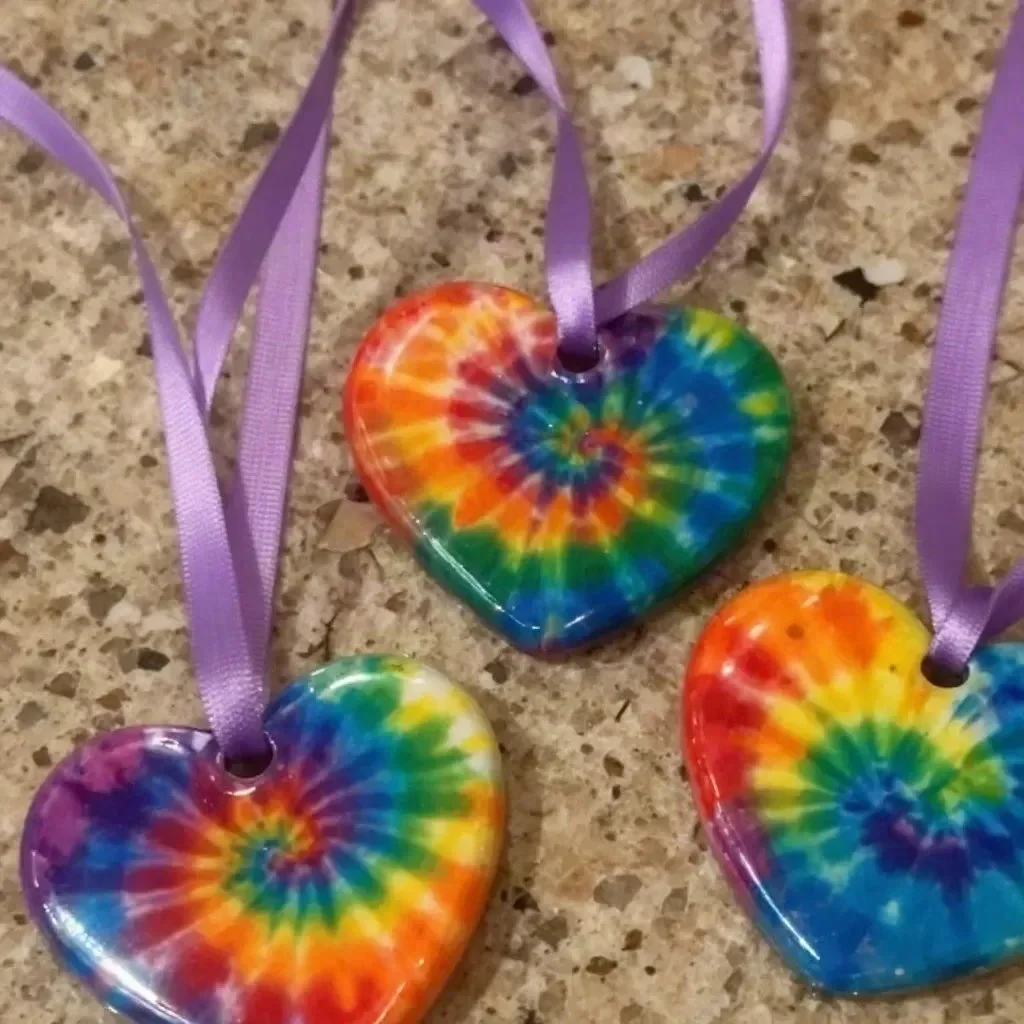
Swirled Glue Suncatchers
Creating Swirled Glue Suncatchers is a delightful and vibrant craft that is not only fun but also showcases beautiful colors as they catch the light. With just a few simple materials, you can create stunning translucent decorations that brighten up any window. The mixture of clear school glue and assorted food coloring allows for endless creative possibilities, making this project perfect for both kids and adults. Plus, the process of swirling colors together offers a satisfying hands-on experience. You may also find Clear Blue Rainbow Bat Suncatcher Wreath Diy useful.
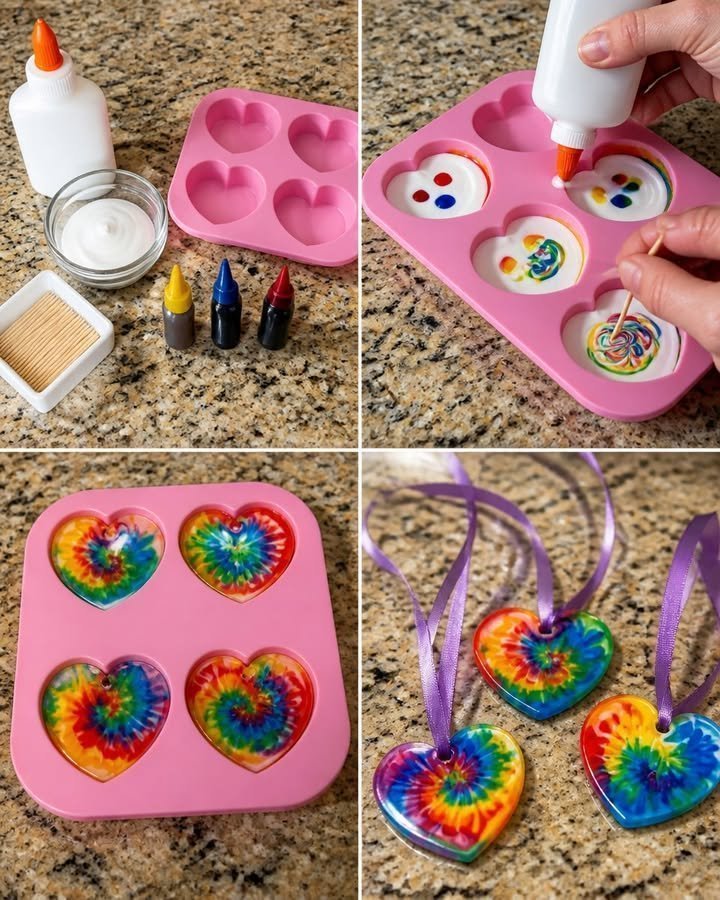
Materials You’ll Need
To make your own Swirled Glue Suncatchers, gather the following materials:
- Clear school glue
- Food coloring (assorted colors)
- Wax paper or contact paper
- Scissors
- Paintbrush (optional)
By using these readily available materials, you’ll see how ordinary items can transform into eye-catching decorations.
How to Make Swirled Glue Suncatchers
Creating these suncatchers is straightforward and requires only a few steps. Here’s how to make them:
Prepare Your Workspace: Begin by laying a 12-inch sheet of wax paper on a flat surface. This will act as your canvas for pouring the glue.
Squeeze the Glue: Take the clear school glue and squeeze it onto the wax paper in fun, free-form shapes. Consider making swirls, spirals, or even hearts.
Add Color: Next, add 1 to 2 drops of different food coloring onto the wet glue. Use a paintbrush (if you have one) to carefully swirl the colors together. You can create beautiful marbled effects by moving the brush gently through the glue.
Drying Time: Allow the glue to dry for about 24 to 48 hours until it becomes firm. It’s essential to be patient during this phase, as proper drying will ensure that your suncatchers retain their shape.
Finishing Touches: Once your suncatchers are completely dried, carefully peel them off the wax paper. Trim any uneven edges with scissors to finalize your decorations.
For additional inspiration, you might enjoy checking out this clear pink unicorn suncatcher, which offers a lovely take on the colored art for kids.
Tips for Success
To achieve the best results with your Swirled Glue Suncatchers, consider these helpful tips:
Experiment with Colors: Don’t hesitate to mix and match different food colors to create unique shades. Just remember that combining too many colors may result in brown or muddy hues, so choose complementary colors.
Variety of Shapes: Play around with different shapes. Try making circles, stars, or abstract forms to see which ones you like best.
Test Your Design: If you’re not sure how a combination of colors will work, test your design on a small piece of wax paper first.
Use a Window as a Guide: To see how your suncatcher will look hanging, hold it up against a window before finally peeling it off the wax paper. This can inspire you to adjust colors or designs before they dry fully.
If your kids love suncatchers, encourage them to create additional projects like this clear rainbow ghost shaker suncatcher craft for Halloween!
Customization Ideas
One of the best parts about making suncatchers is the opportunity to customize them! Here are some creative ideas:
Seasonal Themes: Change your colors and shapes according to the seasons. Pastel colors work great for spring, while warm oranges and browns are perfect for fall.
Layered Suncatchers: To create deeper designs, consider layering different shapes on top of one another. Just ensure that each layer dries completely before adding the next.
Add Glitter: While the glue is still wet, sprinkle some glitter on your designs for a sparkling effect. This adds a lovely shine when they catch the light.
Gift Idea: These suncatchers can make perfect gifts! Wrap them up nicely and present them to friends or family.
Frequently Asked Questions
1. How do I hang my suncatcher?
You can use a bit of clear string or fishing line to hang your suncatcher in a window. Tape it to the top of the piece and allow it to dangle freely.
2. Can I use different types of glue?
While clear school glue is recommended for its translucence and flexibility, other types of glue can be used. Just be aware that they may not create the same clear effect.
3. What if my suncatcher breaks?
Since these suncatchers are relatively delicate, handle them with care. If they do break, you can reattach pieces with a bit of glue or incorporate them into a mixed media project.
4. How can I store my suncatchers?
When not on display, store your suncatchers flat between sheets of wax paper to prevent them from sticking together.
Conclusion
Crafting Swirled Glue Suncatchers is a fantastic way to unleash creativity while making colorful decorations that bring joy and warmth to your home. To explore more creative suncatcher ideas, check out this Colorful DIY Glue Suncatcher Craft to expand your craft repertoire!
Print
Swirled Glue Suncatchers
- Total Time: 48 hours
- Makes: 1 suncatcher
Description
Create vibrant Swirled Glue Suncatchers that beautifully catch the light and brighten any window with just a few simple materials.
Materials
- Clear school glue
- Food coloring (assorted colors)
- Wax paper or contact paper
- Scissors
- Paintbrush (optional)
Instructions
- Prepare your workspace by laying a 12-inch sheet of wax paper on a flat surface.
- Squeeze the clear school glue onto the wax paper in fun shapes.
- Add 1 to 2 drops of different food coloring onto the wet glue and swirl together with a paintbrush.
- Allow the glue to dry for about 24 to 48 hours.
- Peel the suncatchers off the wax paper and trim any uneven edges.
Notes
Experiment with colors and shapes for unique designs. Use glitter for added sparkle and consider seasonal themes.