

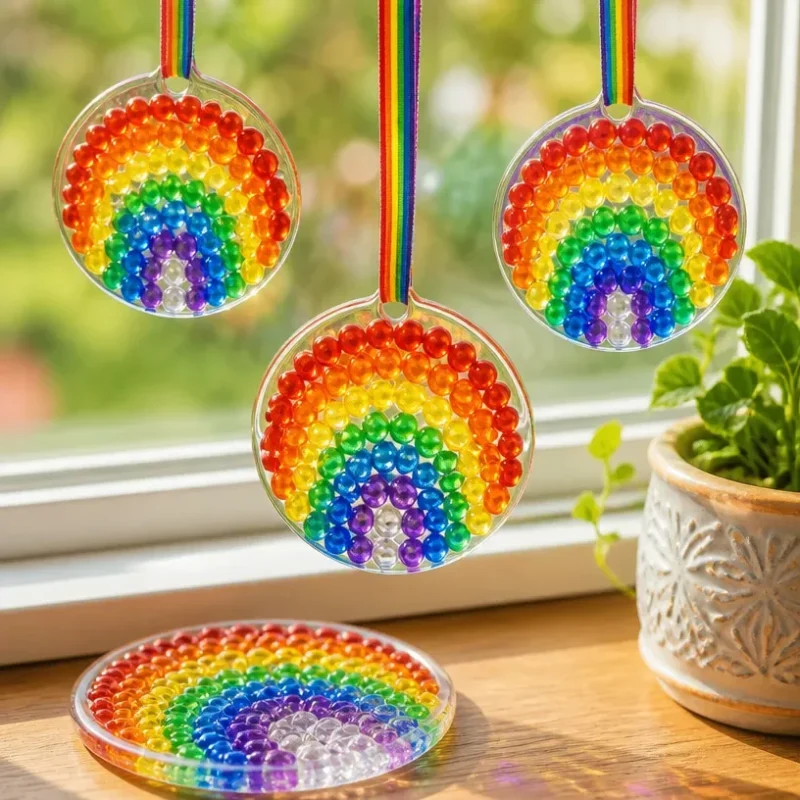
Melted Rainbow Bead Window Drops
Creating beautiful decorations for your windows can brighten up any room, and Melted Rainbow Bead Window Drops are particularly enchanting. These colorful drops catch the light and create a stunning effect, perfect for adding a touch of whimsy to your home. The process of making them is simple and can be incredibly satisfying, making it an ideal craft for both beginners and families. You may also find Colorful Rainbow Feather Window Decor Artwork useful.
Materials You’ll Need
To get started, gather the following materials: You may also find Crystal Cloud Raindrops Diy Window Suncatcher useful.
- Pony beads in various colors (the more, the merrier!)
- Oven-safe molds (silicone molds work best for easy removal)
- Baking sheet (for placing your molds)
- Oven for melting the beads
- Parchment paper (optional, for easier cleanup)
- String or fishing line (for hanging the completed drops)
- Screwdriver or similar tool (to create holes in the melted beads)
With these simple materials, you’re all set to begin your crafting adventure! If you’re looking for additional color inspiration, consider using the techniques from projects like the Colorful Rainbow Window Suncatcher.
How to Make Melted Rainbow Bead Window Drops
This project is as straightforward as it is colorful. Follow these step-by-step instructions to create your very own melted rainbow beads. You may also find Diy Colorful Rainbow Mandala Window Decor useful.
Preheat the Oven: Start by preheating your oven to 400°F (200°C). This temperature is perfect for melting the beads without burning them.
Arrange the Beads: Place the pony beads into the molds, arranging them in patterns or random clusters based on your aesthetic preferences. Keep in mind that the colors will blend together when melted; you might want to have a few examples in mind!
Bake Your Beads: Place the molds on a baking sheet to prevent any spills. Carefully transfer your baking sheet to the oven and let the beads melt for around 20 to 25 minutes. Keep an eye on them to make sure they don’t overflow.
Create Holes for Hanging: When the beads are completely melted, remove the molds from the oven and let them cool for a few minutes. Use a screwdriver or similar tool to poke a hole in the bottom of each bead drop while they are still warm and pliable.
Cool Completely: Allow the melted beads to cool completely in the molds. This will make it easier to remove them without breaking.
Remove and String: Once cooled, you can gently pop the melted beads out of the molds. String them using your choice of cord, and then you’re ready to display your beautiful creations!
Tips for Success
Experiment with Colors: Don’t hesitate to mix and match colors. The way the beads interact when melted can create stunning effects, reminiscent of stained glass.
Avoid Overcrowding: When placing the beads in the molds, leave some space between them, as they will expand while melting.
Check for Even Melting: If some areas didn’t melt completely, consider placing them back in the oven for a few minutes.
Make it a Family Project: Involve kids in the design process! It’s a great way to foster creativity and teamwork. You can also check out other family-friendly crafts like the Easy Rainbow Beaded Pipe Cleaner Snails Tutorial for more inspiration.
Creative Display Ideas
Your melted rainbow drops can be displayed in so many ways! Here are a few ideas:
Window Hangings: Simply use string to hang them from your window. The sunlight will illuminate the colors beautifully.
Garden Decor: Hang them on branches or hooks outdoors for colorful garden ornamentation.
Wall Art: Arrange the drops in a pattern on a canvas or display board for a unique piece of wall art.
Frequently Asked Questions
How do I care for my melted rainbow bead drops?
Maintaining them is easy! Wipe them with a damp cloth if they collect dust, but avoid harsh chemicals that may scratch the surface.
Can I use other types of beads?
While pony beads are recommended for this project, you can try other brands as long as they are made from the same material that melts at a similar temperature.
How can I make larger drops?
If you’d like larger shapes, consider using larger molds. Just be mindful that they will probably take a bit longer to melt completely.
Conclusion
Melted Rainbow Bead Window Drops are not only fun to create, but they also add a beautiful touch to any space. These crafts resonate well with both children and adults, allowing for creativity and personalization. For a related idea, explore how to make Melted Pony Bead Ornaments to enhance your holiday decor, or check out the educational Teen-To-Go Projects for more engaging activities to enjoy as a family! Enjoy crafting!
Print
Melted Rainbow Bead Window Drops
- Total Time: 35 minutes
- Makes: Varies
Description
Craft enchanting window decorations with Melted Rainbow Bead Window Drops that catch the light beautifully.
Materials
- Pony beads in various colors
- Oven-safe molds (silicone molds preferred)
- Baking sheet
- Oven
- Parchment paper (optional)
- String or fishing line
- Screwdriver or similar tool
Instructions
- Preheat the oven to 400°F (200°C).
- Arrange the pony beads into the molds by creating patterns or clusters.
- Bake the molds on a baking sheet for 20 to 25 minutes until melted.
- Create holes for hanging while the beads are still warm.
- Cool completely in the molds.
- Remove the melted beads and string them for display.
Notes
Experiment with colors and patterns for unique designs. Involve kids for a fun family project!