


Rainbow-Themed Photo Frame for Baby’s First Day Milestone
Creating a rainbow-themed photo frame for your baby’s first day milestone is a delightful and visually stunning way to celebrate this special occasion. This craft combines a fun and engaging process with simple materials, resulting in a beautiful frame that captures those precious memories. The vibrant colors of the rainbow will not only brighten up any room but also serve as a heartwarming keepsake for years to come. You may also find Rainbow Pencil Butterfly Suncatcher First Day Gift useful.
Why This Craft Works So Well
The joy of this DIY project lies in its simplicity and the colorful transformation of everyday materials. Using easily accessible supplies, you’ll be creating a lovely frame that showcases your baby’s first day photo in a creative way. If you’re looking for other creative projects, consider making a rainbow pencil butterfly suncatcher to complement your photo frame.
Materials You’ll Need
Before diving into the crafting process, gather the following materials: You may also find Colorful Rainbow Stained Glass Lantern For Candles useful.
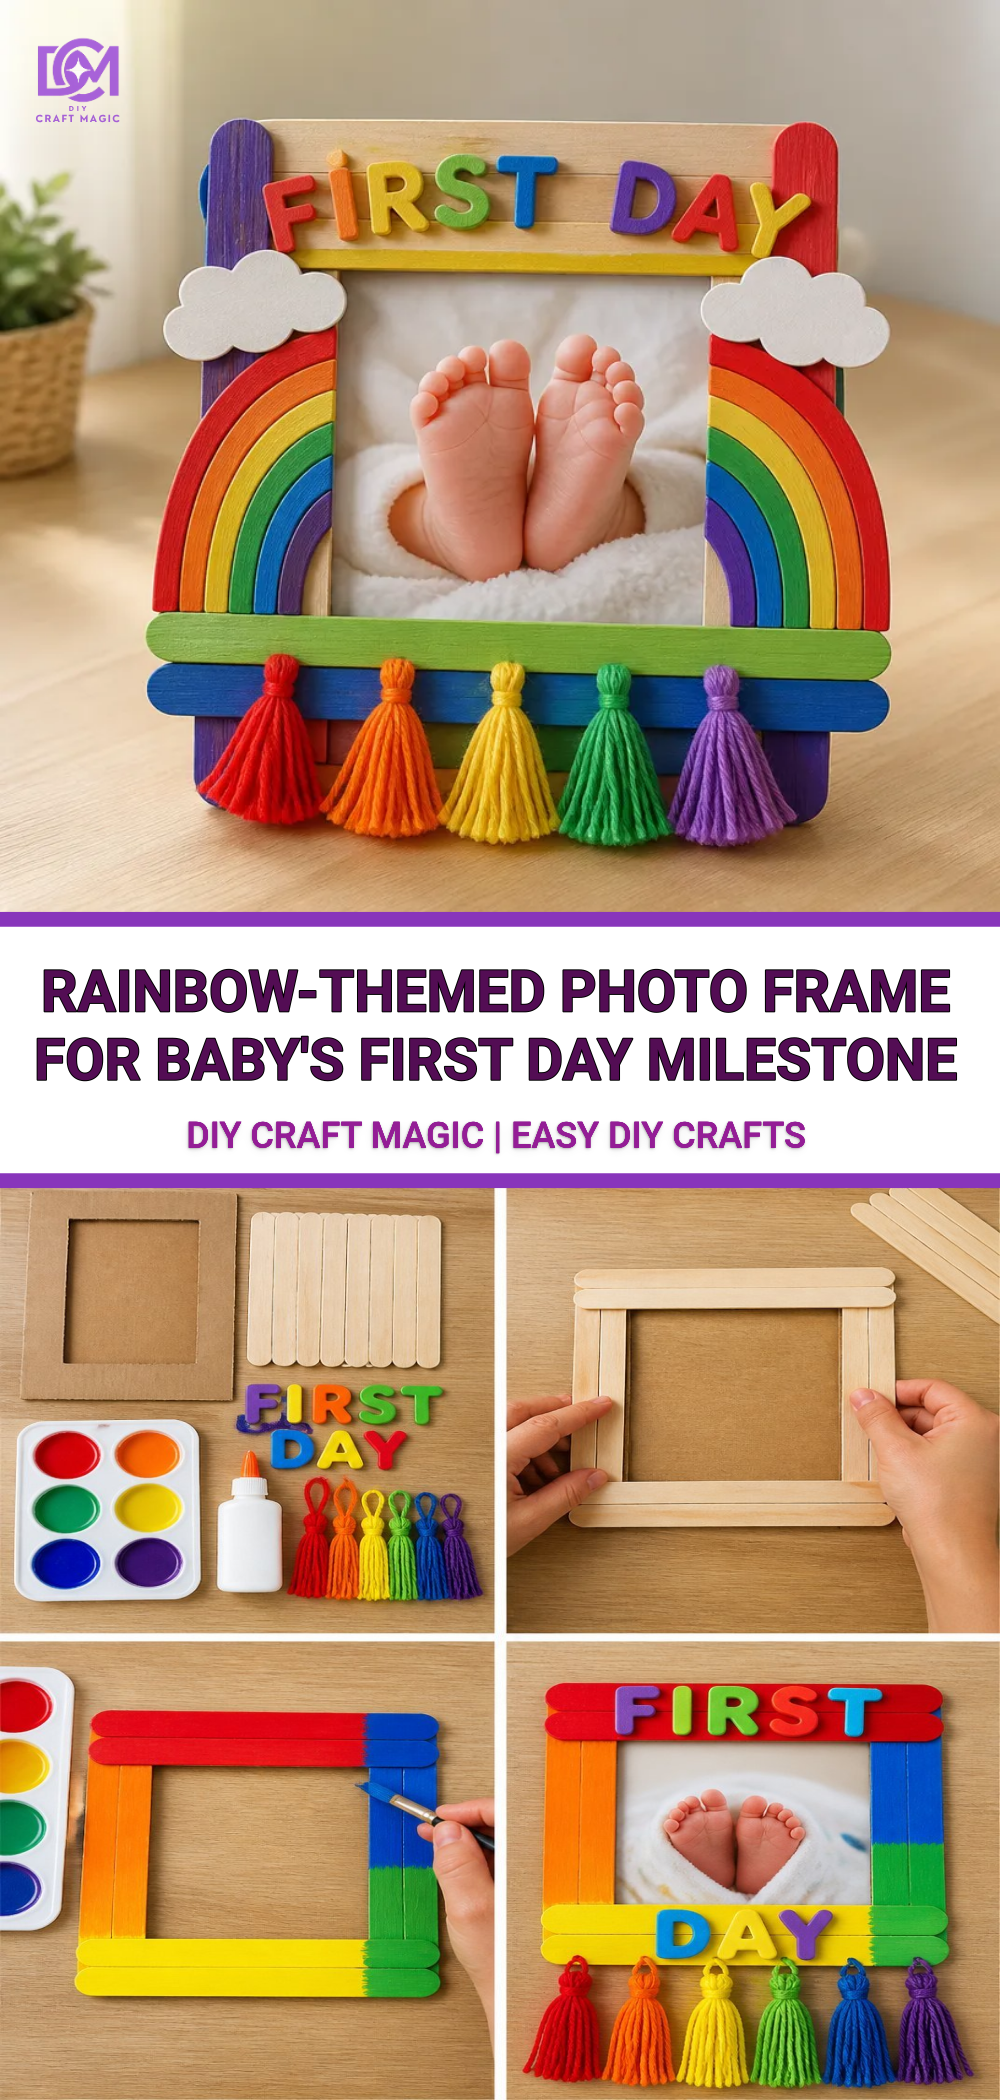
- A sturdy cardboard frame or a wooden photo frame
- Acrylic paints in rainbow colors (red, orange, yellow, green, blue, indigo, violet)
- Paintbrushes of various sizes
- A small cup of water for rinsing brushes
- Paper towels for drying
- Mod Podge or a clear acrylic sealer
- Decorative elements such as stickers or washi tape (optional)
- Photo of your baby’s first day
How to Make Rainbow-Themed Photo Frame
Step 1: Prepare Your Frame
Start by laying down newspaper or a protective cloth on your work surface to catch any paint spills. If you’re using a cardboard frame, ensure it’s clean and free of dust.
Step 2: Paint the Frame
Using your larger paintbrush, dip into your chosen paint colors and start applying them one by one around the frame. Begin with red on one end of the frame and continue in the order of the rainbow, blending each color into the next. Allow drying time between coats to avoid smudging.

Step 3: Add Decorative Elements
Once the paint has dried completely, this is the perfect time to add any decorative elements to the frame. Use stickers or washi tape to accentuate the frame, applying them in between the colors or at the corners for added flair.
Step 4: Seal the Frame
To protect your artwork and give it a glossy finish, apply a coat of Mod Podge or a clear acrylic sealer. This not only enhances the colors but also ensures durability.
Helpful Tips
While crafting, consider the following tips for the best results:
- Use a sponge brush for smoother paint application on cardboard frames.
- If you’re crafting with kids, supervise them while using paint and other materials to ensure safety.
- Think about displaying your frame alongside seasonal crafts, such as a cupcake liner sunflower wreath, for a more festive look.
Common Mistakes to Avoid
- Rushing Drying Times: Allow each layer of paint to dry fully before adding the next color or any decorative elements.
- Skipping the Sealant: Sealing your work is essential for preserving the vibrant colors and ensuring longevity.
- Using Too Much Water: When mixing your paints, use minimal water to prevent the colors from becoming too diluted and losing their vividness.
Ways to Customize It
Add your personal touch to the frame by using various paint techniques or incorporating different media like glitter or fabric to make it even more unique. If you’re looking for more creative ideas, you might enjoy making DIY rainbow mandala stones for home decor as a themed decor piece alongside your photo frame.
Frequently Asked Questions
Can I use different types of frames?
Absolutely! You can use any type of frame, including vintage ones or simple clip frames. Just ensure they are sturdy enough to hold your baby’s photo securely.
How do I prepare the frame for painting?
If using a wooden frame, lightly sand the surface before painting to ensure the paint adheres well. For cardboard, ensure it’s clean and dry.
Can I use spray paint instead of acrylic paint?
Yes, spray paint can be a quick alternative, but make sure to spray in a well-ventilated area and protect surfaces around you.
Display Ideas
Once your rainbow-themed photo frame is complete, consider displaying it on a shelf in your baby’s room or as part of your living area decor. It can serve as a focal point on a gallery wall featuring other cherished moments.
Conclusion
Creating a rainbow-themed photo frame for your baby’s first day milestone not only preserves a special memory but also adds a charming touch to your home decor. To find unique frames, check out the delightful options available on Etsy or explore Amazon for more choices. Happy crafting!
Print
Rainbow-Themed Photo Frame for Baby’s First Day Milestone
- Total Time: 15 minutes
- Makes: 1 completed photo frame
Description
Create a vibrant rainbow-themed photo frame to celebrate your baby’s first day milestone with this simple and engaging DIY craft.
Materials
- A sturdy cardboard frame or a wooden photo frame
- Acrylic paints in rainbow colors (red, orange, yellow, green, blue, indigo, violet)
- Paintbrushes of various sizes
- A small cup of water for rinsing brushes
- Paper towels for drying
- Mod Podge or a clear acrylic sealer
- Decorative elements such as stickers or washi tape (optional)
- Photo of your baby’s first day
Instructions
- Prepare your frame by laying down newspaper on your work surface.
- Paint the frame using chosen colors, blending them smoothly.
- Add decorative elements once the paint has dried completely.
- Seal the frame with Mod Podge or a clear acrylic sealer for a glossy finish.
Notes
Consider customizing your frame with glitter or fabric for a unique touch. Supervise children while crafting for safety.