

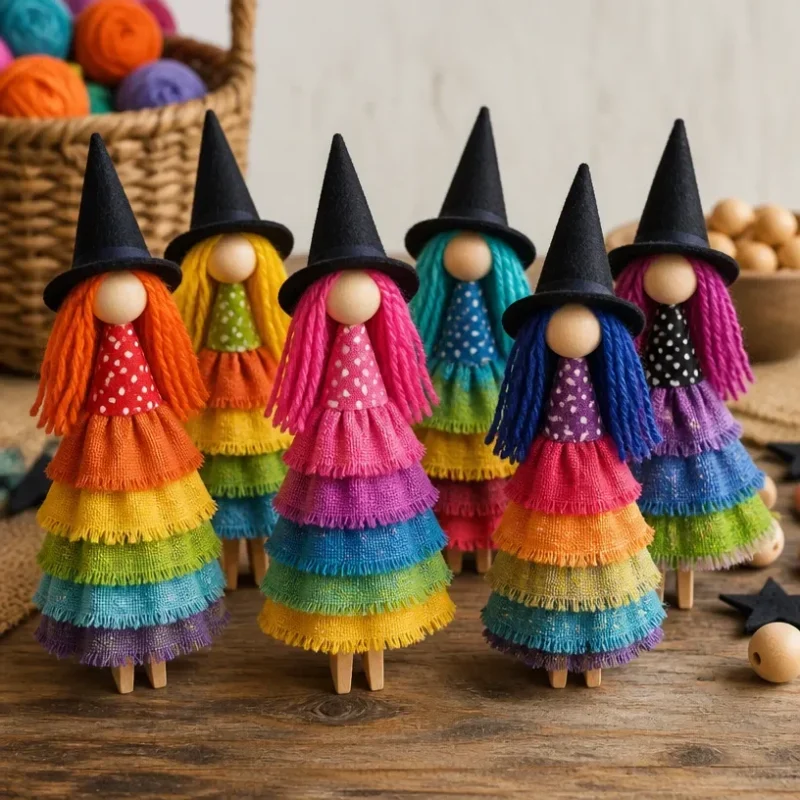
Retro Rainbow Witch Clothespin Dolls for Collectors
Embrace your creative side with a craft project that brings a burst of color and whimsy into your life. In this tutorial, you’ll learn how to make adorable Retro Rainbow Witch Clothespin Dolls that are not just collectibles but also a delightful addition to your Halloween décor. The vibrant colors and charming designs will make them a favorite among kids and adults alike. Plus, the process of creating these dolls is incredibly satisfying and straightforward, making it an excellent project for beginners and crafty families. You may also find Rainbow Crystal Bat Clothespin Mobile For Kids useful.

You may also find Melted Crayon Rainbow Butterfly Suncatcher For Kids useful.
Materials You’ll Need
To make your Retro Rainbow Witch Clothespin Dolls, you will require the following materials: You may also find Melted Crayon Rainbow Heart Suncatcher For Kids useful.
- Wooden clothespins
- Acrylic paints in various rainbow colors (red, orange, yellow, green, blue, purple)
- Paintbrushes (small and medium-sized)
- Sharpie markers (black and assorted colors)
- Mod Podge or a finishing sealant
- Googly eyes (small)
- Black construction paper (for hats)
- Scissors
- Hot glue gun (with adult supervision)
- Optional embellishments (glitter, sequins, etc.)
Why You’ll Love This Project
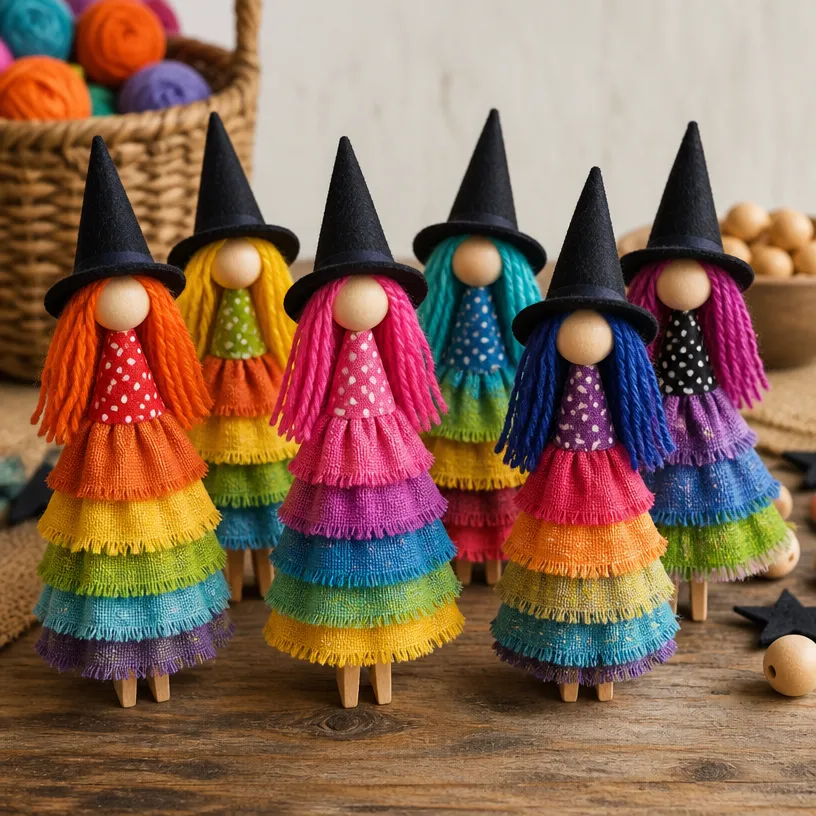
Creating these clothespin dolls is an enjoyable way to explore your artistic skills while spending quality time with your family. Each doll can be uniquely customized, allowing you to experiment with different color combinations, sizes, and embellishments. Additionally, this project embraces the seasonal spirit, making it ideal for decorating your home for Halloween or fall. For inspiration on other colorful projects, check out our tutorial on DIY Rainbow Mandala Stones for Home Decor.
Step-by-Step Instructions
Paint the Clothespins: Start by selecting your acrylic paint colors. You can use traditional witch colors or opt for a more vibrant rainbow palette. Paint each clothespin, allowing some sections to overlap for a blended effect. Set aside to dry completely.
Create the Faces: Once the paint is dry, use Sharpie markers to draw whimsical faces on the top of the clothespins. Encourage imagination by varying the expressions and designs on each doll.
Assemble the Hats: Cut out triangles or cone shapes from the black construction paper to create witches’ hats. Use your hot glue gun to assemble these hats and attach them to the top of the clothespin dolls.
Add Details: For extra flair, glue on googly eyes and any optional embellishments like glitter or sequins to make the dolls sparkle.
Seal Your Creation: To ensure your beautiful creations last, apply a layer of Mod Podge or another finishing sealant once everything is dry. This step can also add a glossy finish, enhancing the colors’ vibrancy.
Helpful Tips
Experiment with Colors: Don’t hesitate to mix your paints to achieve unique shades that match your home décor or personal taste. You can also explore other craft projects, like the Colorful Rainbow Stained Glass Lanterns, to continue your colorful crafting journey.
Display Your Dolls: Once finished, these clothespin dolls make excellent shelf decorations, table centerpieces, or even fun gifts for friends and family. Use a small stand or simply clip them to a string for a colorful garland.
Common Mistakes to Avoid
Rushing the Drying Process: It can be tempting to move quickly through projects, but allowing the paint and adhesive to dry properly will ensure a better finish and longevity for your dolls.
Using Too Much Glue: When attaching embellishments or parts like the hats, a little glue goes a long way. Too much can cause messiness that detracts from the finished look.
Not Personalizing: Each doll is a canvas for your creativity! Experiment with different designs and colors to make them truly yours.

Frequently Asked Questions
Can I make these with younger children?
Yes! This project is suitable for all ages, but adult supervision is recommended when using hot glue.
What if I don’t have acrylic paint?
You can substitute acrylic paint with non-toxic markers or craft paints, but keep in mind that the finish may differ.
How do I store my dolls?
To keep your Retro Rainbow Witch Clothespin Dolls looking great, store them in a dry place away from direct sunlight to prevent fading.Now that you’ve set the scene for some colorful crafting, it’s time to gather your materials and get started on your own Retro Rainbow Witch Clothespin Dolls!
Conclusion
Crafting these colorful dolls can be a wonderful activity for families and friends. Not only are they perfect for Halloween, but they also serve as stunning keepsakes that capture the playful spirit of retro aesthetics. If you’re looking for more creative inspirations, check out these festive ideas: Peg Doll With Hair – Etsy for unique doll accessories and 5 Frighteningly Fun Halloween Countdown Calendar Ideas to enhance your autumn festivities. Happy crafting!
Print
Retro Rainbow Witch Clothespin Dolls
- Total Time: 30 minutes
- Makes: Several dolls
Description
Create vibrant and whimsical Retro Rainbow Witch Clothespin Dolls that are perfect for Halloween décor and collecting.
Materials
- Wooden clothespins
- Acrylic paints in various rainbow colors (red, orange, yellow, green, blue, purple)
- Paintbrushes (small and medium-sized)
- Sharpie markers (black and assorted colors)
- Mod Podge or a finishing sealant
- Googly eyes (small)
- Black construction paper (for hats)
- Scissors
- Hot glue gun (with adult supervision)
- Optional embellishments (glitter, sequins, etc.)
Instructions
- Paint the Clothespins: Start by selecting your acrylic paint colors. You can use traditional witch colors or opt for a more vibrant rainbow palette. Paint each clothespin, allowing some sections to overlap for a blended effect. Set aside to dry completely.
- Create the Faces: Once the paint is dry, use Sharpie markers to draw whimsical faces on the top of the clothespins. Encourage imagination by varying the expressions and designs on each doll.
- Assemble the Hats: Cut out triangles or cone shapes from the black construction paper to create witches’ hats. Use your hot glue gun to assemble these hats and attach them to the top of the clothespin dolls.
- Add Details: For extra flair, glue on googly eyes and any optional embellishments like glitter or sequins to make the dolls sparkle.
- Seal Your Creation: To ensure your beautiful creations last, apply a layer of Mod Podge or another finishing sealant once everything is dry. This step can also add a glossy finish, enhancing the colors’ vibrancy.
Notes
This project is suitable for all ages, but adult supervision is recommended when using hot glue. Experiment with different colors and embellishments to personalize your dolls!