

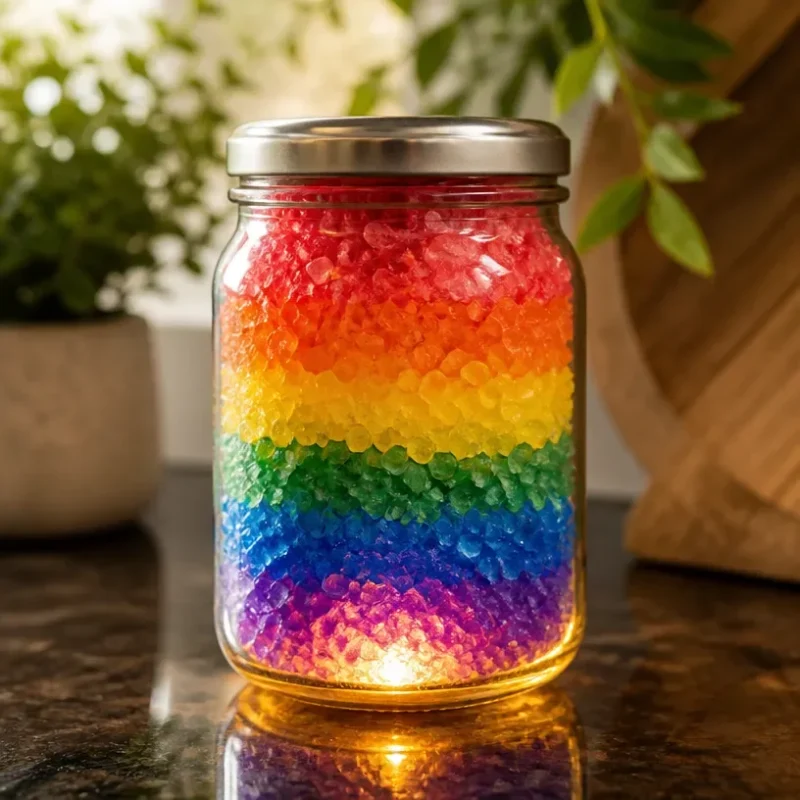
Salt Jar with Rainbow Glow
Creating a Salt Jar with Rainbow Glow brings a burst of color into your home while indulging your creative side. This enchanting project involves layering beautifully colored salt in a jar, producing a stunning visual effect that captures light and makes for a delightful decoration. It’s an approachable craft that can be a satisfying activity for both kids and adults, merging simple materials with a creative process that culminates in a vibrant and eye-catching display. You can even adapt it as a seasonal decoration, adding a fresh touch throughout the year. You may also find Glowing Rainbow Ocean Jellyfish Jar Light useful.
Materials You’ll Need
Before you dive into this colorful project, gather these materials to make the Salt Jar with Rainbow Glow: You may also find Colorful Ocean Jar Decor Rainbow Glass Jar Coastal Homes useful.
- Epsom salt or sea salt
- Food coloring (various colors)
- Clear glass jar with a lid
- Funnel (optional)
- Wooden stick or craft spoon for mixing
- Baking sheet (for drying the colored salt)
- Parchment paper
How to Make Salt Jar with Rainbow Glow
Follow these steps to create your stunning Salt Jar with Rainbow Glow. You may also find Glow In The Dark Mermaid Jar Diy Craft For Kids useful.
Prepare Your Salt: Begin by measuring out the amount of salt you want to color. It’s helpful to have separate bowls for each color you intend to create. For a vibrant outcome, you might find using Epsom salt particularly effective due to its finer texture. You may also find Glow In The Dark Monster Slime Rainbow Colors useful.
Color The Salt: Add a few drops of food coloring to the salt in each bowl. Use a wooden stick or craft spoon to mix the salt and coloring thoroughly until the desired shade is achieved. The colors should be bright and vivid, giving you layers that really pop in the jar.
Dry The Colored Salt: While you can use the salt immediately, spreading it on a baking sheet lined with parchment paper to dry for a few hours can help achieve a better texture and prevent clumping.
Layer The Salt: Once your colors are dry, it’s time to layer. Using a funnel, pour the colored salt into the glass jar, starting with one color and adding them in layers until the jar is filled. You can combine colors in various ways, creating patterns or stripes to showcase your style.
Seal The Jar: After filling the jar with the colorful salt, secure the lid to keep everything in place. Feel free to add a decorative touch to the jar lid if you wish; this can include ribbons, stickers, or an added glow-in-the-dark element.
Customization Ideas
You can customize your Salt Jar with Rainbow Glow in numerous ways. For instance, consider adding glitter to the salt for a sparkling effect, making it visually appealing when the light hits it. This way, you’ll have a shimmering, magical look that you might also enjoy in projects like rainbow potion jars with glitter swirl.
Display Ideas
Once you’ve completed your Salt Jar, think about where you want to display it. Placing it on a sunny windowsill can enhance its colorful glow and radiance. Alternatively, these jars also make fantastic gifts, and you can arrange several of them together for a stunning centerpiece.
Tips for Success
- When coloring the salt, start with a small amount of food coloring, as it’s easier to darken the shades than to lighten them.
- For a more orderly look, use different-sized jars and arrange them in a gradient or rainbow order.
- If making this project with children, supervise them during the heating and pouring stages for safety.
Frequently Asked Questions
Can I use regular table salt instead of Epsom salt?
Yes, regular table salt can be used, but Epsom salt may create a more appealing texture.
How long will the colored salt last?
If stored properly in a sealed jar, the colored salt will last indefinitely, offering lasting beauty.
What if the colors fade over time?
If the colored salt is placed in direct sunlight for prolonged periods, some fading may occur. To preserve brightness, keep the jar in a shaded area.
Conclusion
The Salt Jar with Rainbow Glow is not just a simple craft; it’s a beautiful project filled with opportunities for customization. As you explore other creative ventures, consider trying out recipes like rainbow glitter salt dough for even more colorful fun, or use some of the fishing enthusiasts’ favorites like PowerBait® Natural Glitter Trout Bait for a unique twist to your crafting experience. Enjoy your crafting journey, and watch as your salt jars bring joy and color into your life!
Print
Salt Jar with Rainbow Glow
- Total Time: 15 minutes
- Makes: 1 jar
Description
Create a stunning Salt Jar with vibrant layers of colored salt, perfect for decor or gifts.
Materials
- Epsom salt or sea salt
- Food coloring (various colors)
- Clear glass jar with a lid
- Funnel (optional)
- Wooden stick or craft spoon for mixing
- Baking sheet (for drying the colored salt)
- Parchment paper
Instructions
- Prepare your salt by measuring out the amount you want.
- Color the salt by adding food coloring and mixing until desired shade is achieved.
- Dry the colored salt on a baking sheet lined with parchment paper for a few hours.
- Layer the colored salt in the glass jar using a funnel.
- Seal the jar with a lid and decorate if desired.
Notes
For brighter colors, consider using Epsom salt due to its finer texture. You can also add glitter for a shimmering effect.