


Rainbow Stained Glass Lantern for Schoolhouse Decor
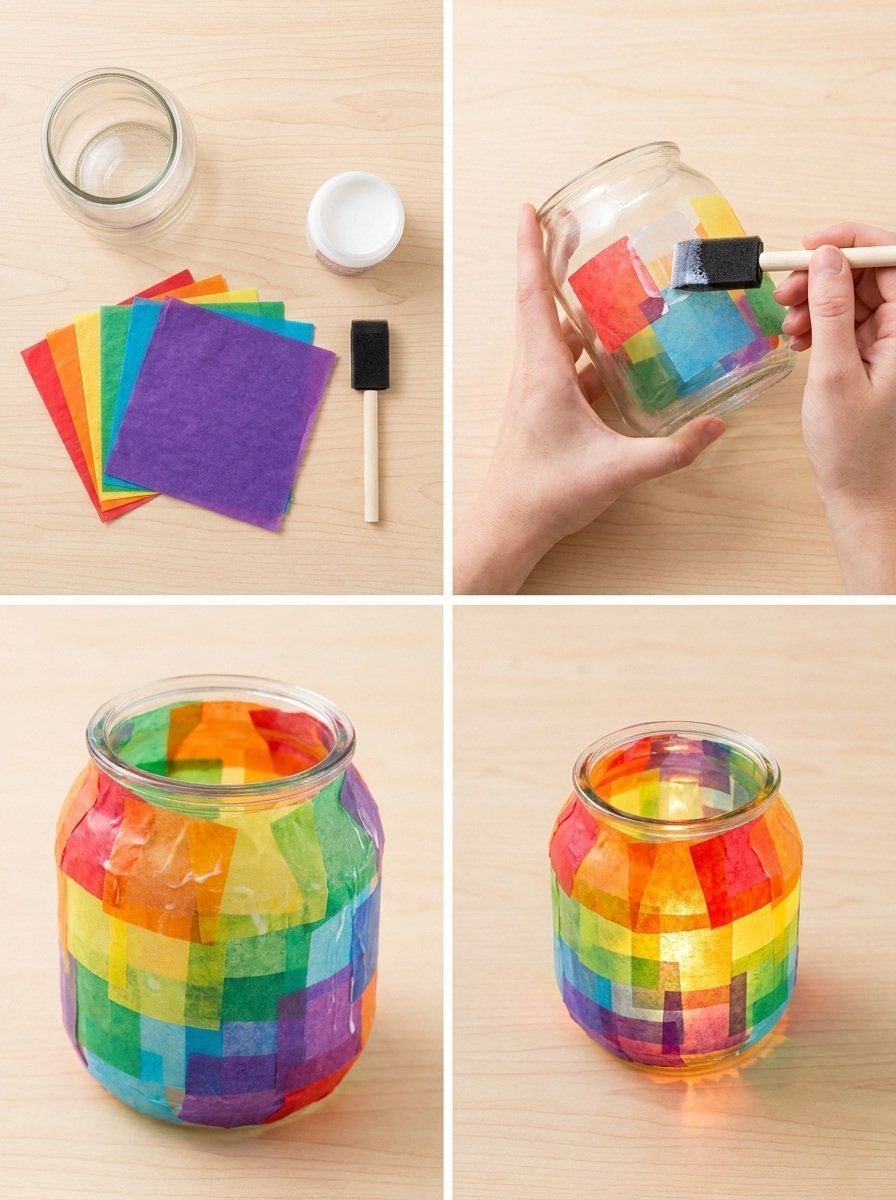
Creating a colorful Rainbow Stained Glass Lantern is an exciting project that adds a vibrant and artistic touch to your schoolhouse decor. This craft not only transforms ordinary materials into a dazzling piece that brightly reflects light but also provides a wonderful hands-on experience for families. You’ll be left with a stunning lantern that showcases your creativity in every color of the rainbow. You may also find Colorful Rainbow Stained Glass Lantern For Candles useful.
Why You’ll Love This Project
This art project is perfect for both kids and adults, making it a fantastic activity for families or classroom settings. As you layer different colors of tissue paper to create the stained glass effect, you’ll see your lantern come to life with each step. The outcome is a beautiful lantern that can illuminate your space and spark joy. You may also find Diy Rainbow Mandala Stones For Home Decor useful.

You may also find Milk Jug Stained Glass Lanterns Recycled Outdoor Lights useful.
Materials You’ll Need
Gather the following materials to get started on your Rainbow Stained Glass Lantern:
- Clear glass jar (like a mason jar)
- Mod Podge or school glue
- Colorful tissue paper in various rainbow shades
- Scissors
- Paintbrush
- Wick and candle (LED recommended for safety)
- Optional: Ribbon, beads, or embellishments for decoration

Step-by-Step Instructions
Follow these steps to create your Rainbow Stained Glass Lantern:
Prepare Your Workspace: Lay down some newspaper or a plastic tablecloth to protect your work surface from glue spills.
Cut Tissue Paper: Use your scissors to cut the colorful tissue paper into small squares. Consider mixing different shades for a more vibrant effect. For additional ideas, check out this fun flower lantern project for inspiration.
Apply the Glue: Using the paintbrush, apply a thin layer of Mod Podge or glue to a section of the jar. Be sure to cover the area evenly.
Layer the Squares: Place the first layer of tissue paper squares onto the glued surface. Gently press down to secure them, ensuring that they overlap slightly to create a seamless look.
Repeat the Process: Continue applying glue and adding layers of tissue paper until the jar is covered. You can mix colors creatively to form patterns or leave some spaces clear for more light to shine through.
Seal the Lantern: Once you are happy with the coverage, apply a final layer of Mod Podge on top of the tissue paper to seal it. This will give your lantern a glossy finish and help preserve it.
Let It Dry: Allow your lantern to dry completely. It may take a few hours, depending on the humidity in your area.
Add the Wick and Candle: If you’re using a real candle, make sure to place the wick carefully at the bottom of the jar. For safety, consider using an LED candle instead.
Getting the Colors Right
Choosing the right colors is essential for achieving an eye-catching look. Bright colors like yellow, orange, and pink add warmth, while blues and greens bring a refreshing feel. You can experiment with different combinations to see what looks best in your lantern.
Creative Customizations
Feel free to customize your lantern to match your decor! You might want to add embellishments like beads, twine, or even glitter. For more ideas, consider checking out this ocean jar decor for a seaside-inspired touch.
Troubleshooting Common Issues
- Paper Tears: If you notice any tears in the tissue paper during application, don’t worry! You can easily patch them with more small pieces of paper.
- Bubbles Under Paper: Press down gently with your fingers or a soft cloth to remove air bubbles. You want to ensure a flat surface for even light distribution.
Frequently Asked Questions
How do I hang the lantern?
If you wish to hang your lantern, you can attach a wire around the neck or use a decorative ribbon securely tied.
Can I use a spray sealant instead of Mod Podge?
Yes, a clear spray sealant can work well to finish your project, but be sure to ventilate your workspace when using it.
How long will it last?
With proper care, your lantern can last for many seasons. Just keep it away from direct sunlight to prevent fading of the colors.
Conclusion
Crafting your Rainbow Stained Glass Lantern is a wonderful way to bring color and creativity into your home or classroom. For more tips on using color effectively in your spaces, explore these easy color tricks. If you’re interested in purchasing unique lampshades, check out this selection of colored glass lampshades for additional inspiration. Enjoy your crafting journey!
Print
Rainbow Stained Glass Lantern
- Total Time: 60 minutes
- Makes: 1 lantern
Description
Create a colorful Rainbow Stained Glass Lantern that adds vibrant artistic touch to your decor, perfect for families and classrooms.
Materials
- Clear glass jar (e.g., mason jar)
- Mod Podge or school glue
- Colorful tissue paper in various rainbow shades
- Scissors
- Paintbrush
- Wick and candle (LED recommended for safety)
- Optional: Ribbon, beads, or embellishments for decoration
Instructions
- Prepare your workspace: Lay down newspaper or a plastic tablecloth to protect from glue spills.
- Cut tissue paper into small squares for layering.
- Apply a thin layer of Mod Podge or glue to a section of the jar.
- Layer the first layer of tissue paper squares onto the glued surface.
- Repeat the process of applying glue and adding layers until the jar is covered.
- Seal the lantern with a final layer of Mod Podge.
- Let it dry completely.
- Add the wick and candle carefully at the bottom of the jar.
Notes
Customize with embellishments like beads or twine. Ensure to avoid fading by keeping away from direct sunlight.